Getting Started
Prerequisites
Later we will be installing a SQLite database tool and a number of NuGet packages, but initially the only prerequisite is that Visual Studio 2022 is installed on your PC:
- Visual Studio 2022 Community (download link) I'm using Version 17.4.4
YouTube Video
Create the Project
- Open Visual Studio 2022
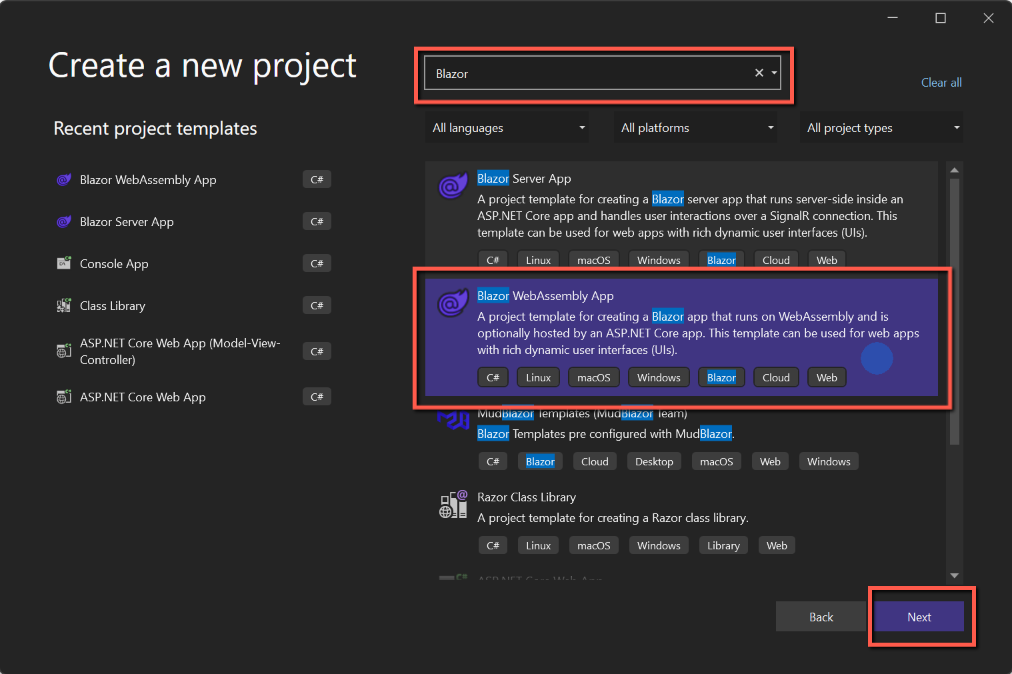
- Select 'Create a new project'
- Enter 'Blazor' in the search box at the top of the form and select 'BlazorWebAssembly App' from the list of options and click 'Next'. (You may see a list of 'Recent Project Templates' on the left of the form, but the above method will ensure you get the correct template.)
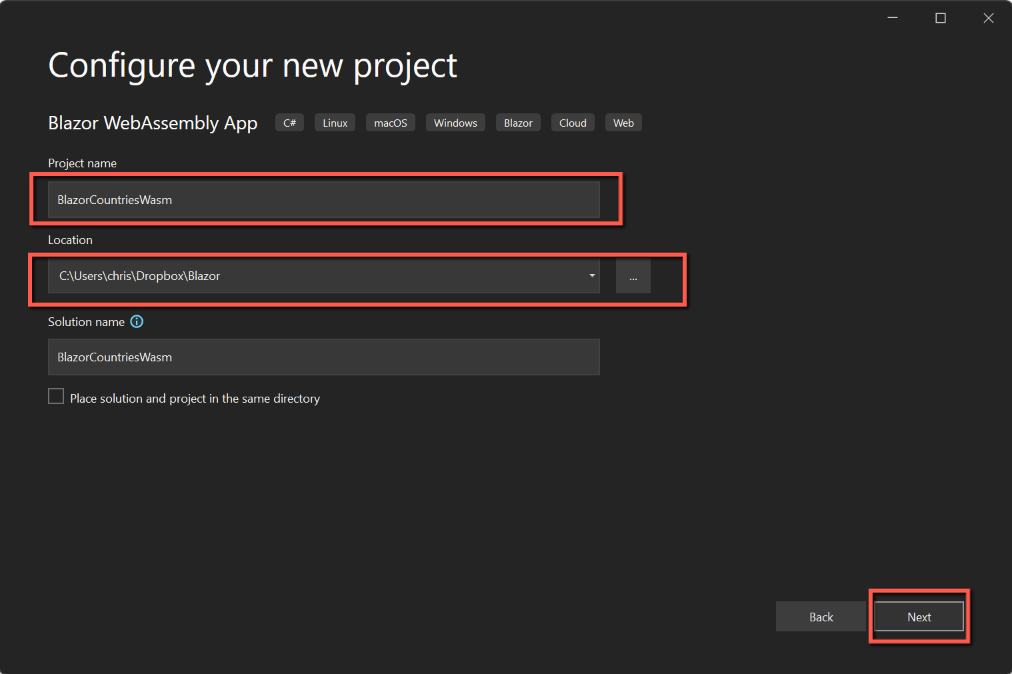
- On 'Configure your new project'
- Enter a name for the project (Hint: do NOT include a hyphen - it will cause Visual Studio to replace the hyphen with underscores in some places but not others. This is a problem you will want to avoid.)
- Enter a location to save the project files
- Leave the 'Solution name' the same as the Project name
- click 'Next'.
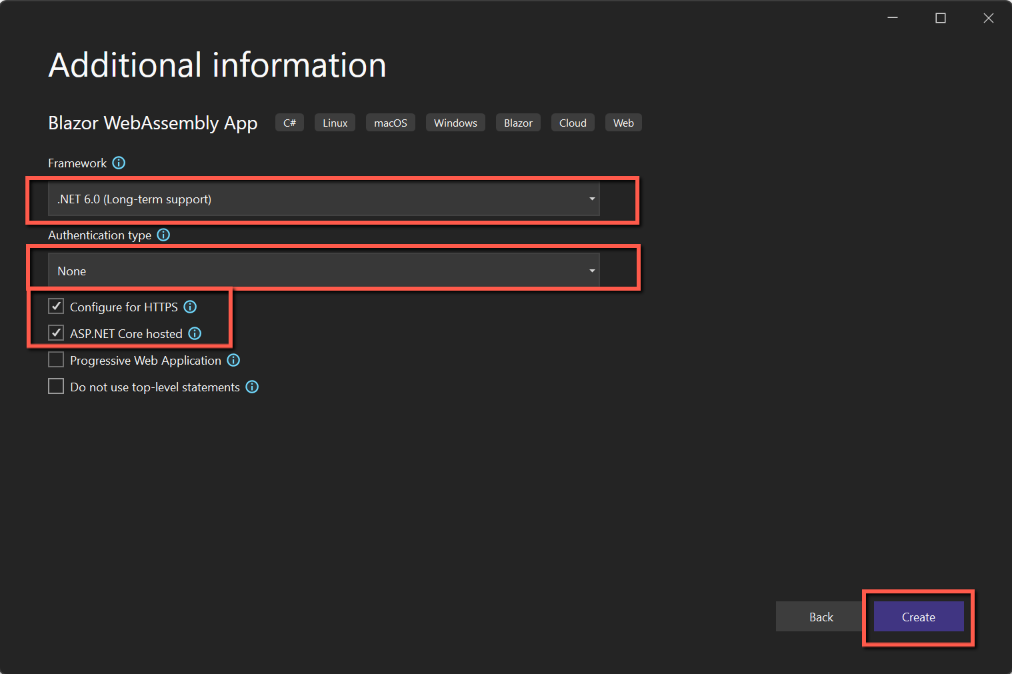
- On 'Additional information' select
- Framework: .NET 7.0
- Authentication type: None
- Configure for HTTPS: check
- ASP.NET Core hosted: check
- click 'Create'

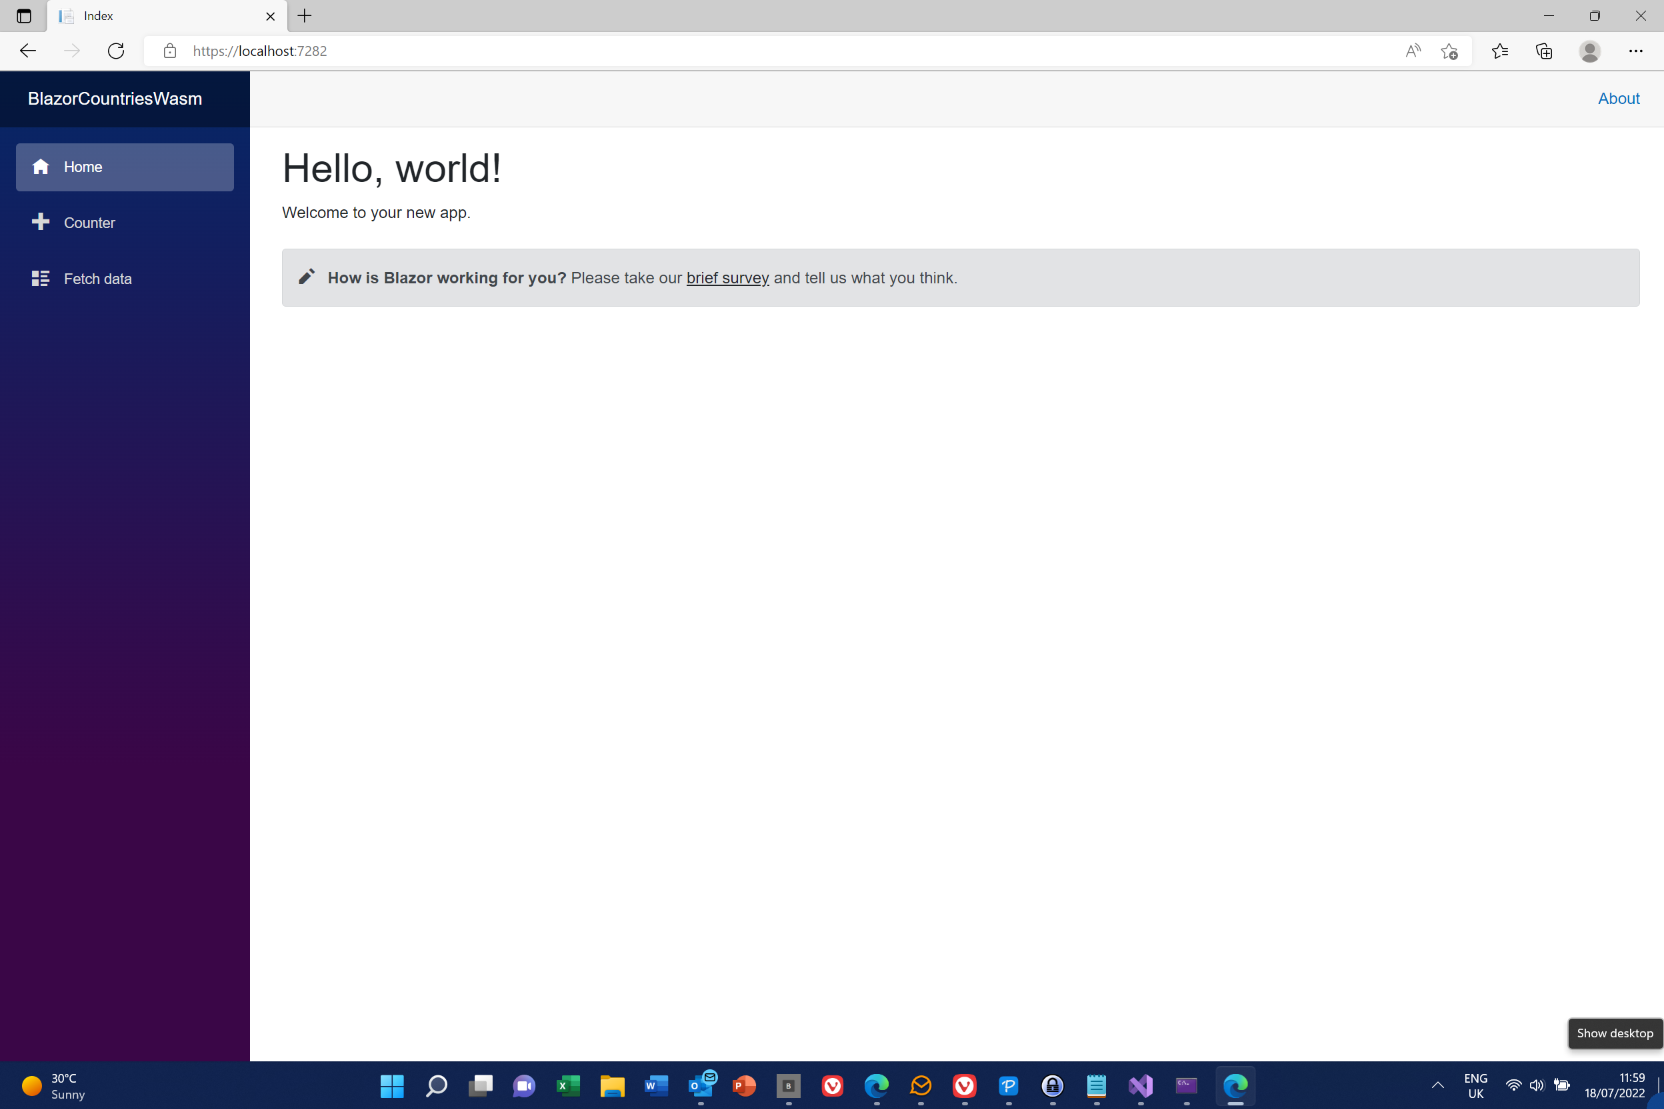
The 'project' (or rather 'solution') will be created and the following screen displayed. It might be slightly different depending on your settings; mine is set to 'Dark' theme (Tools > Options > Environment > General) with the 'Solution explorer' docked to the right of the screen. Notice
Test the project by running it - click the solid green triangle next to the name of the project in the toolbar - this will be BlazorCountriesWasm.Server (as the Server project has automatically be set as the startup project.). Try the 'Counter' and Fetch Data' pages. Close the application.
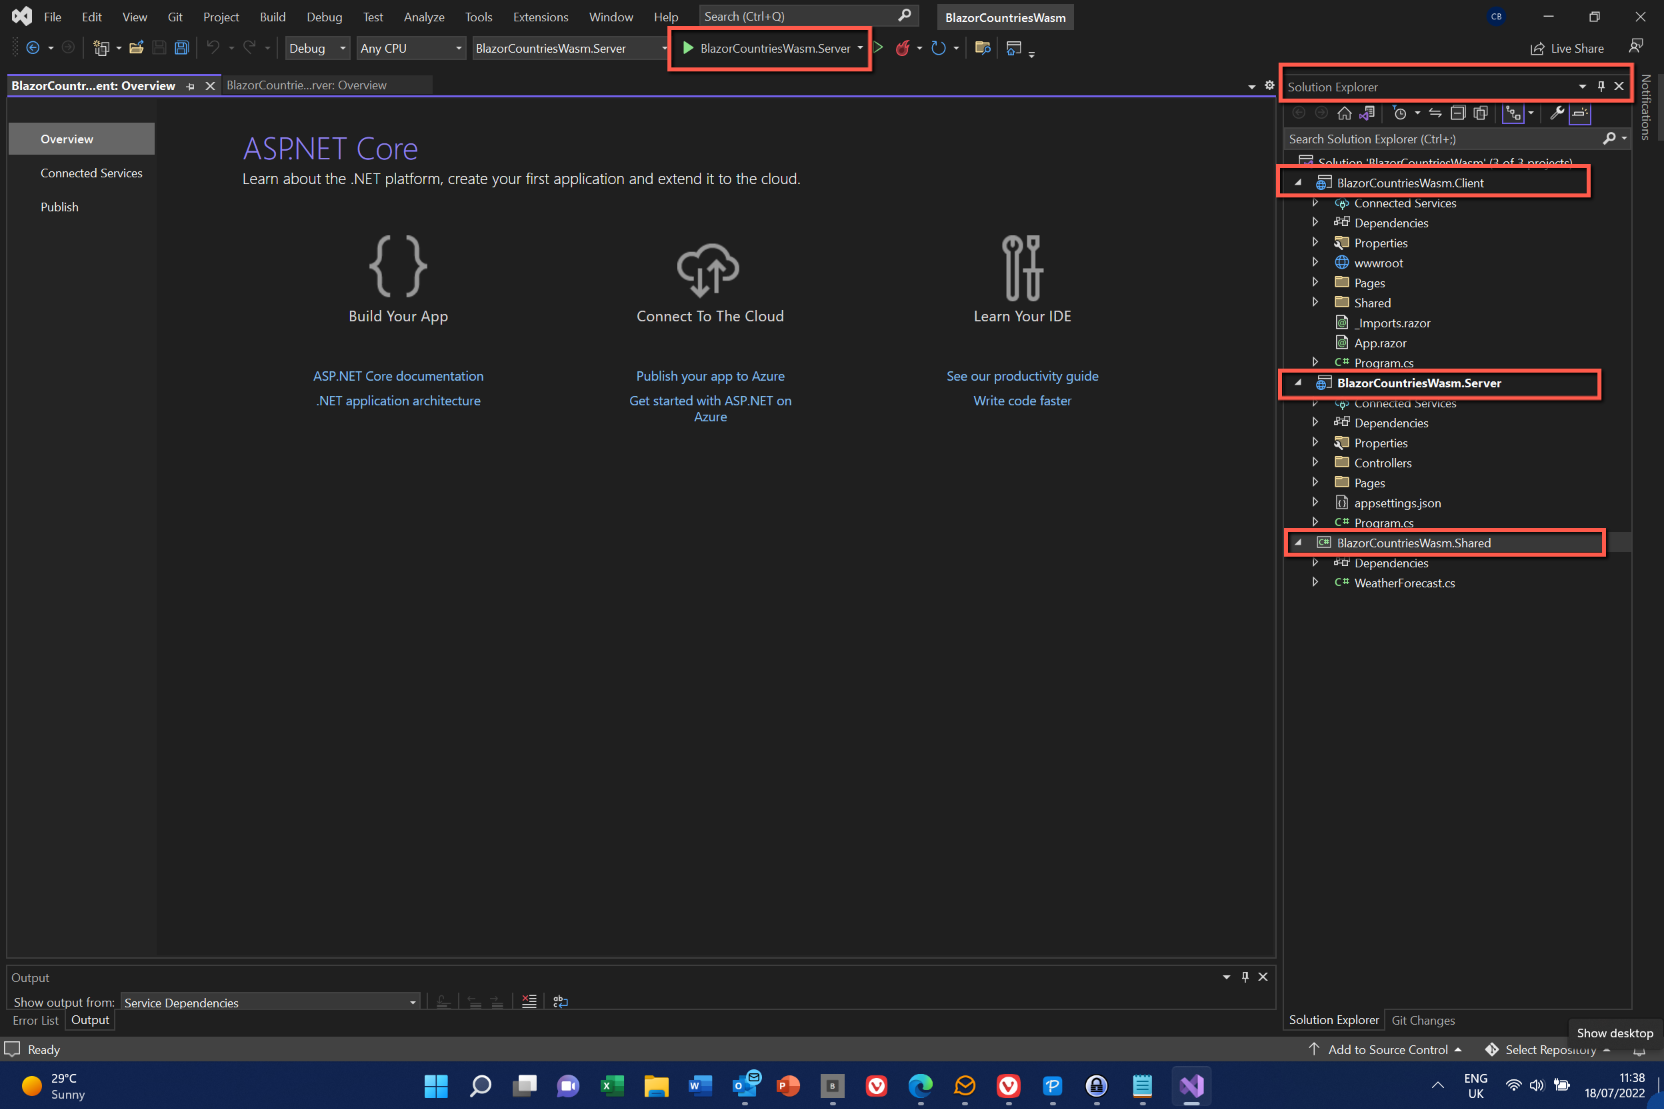
Back in Visual Studio notice that in Solution Explorer there are three projects: one ending with .Client, one with .Server and one with .Shared - if you don't have the three projects check that you selected 'ASP.NET Core hosted' when creating the project.
Add Model Classes
The first thing we will do is to add 'model' classes. In our case we will need two model classes, one for countries and one for cities. When we add the database later the model classes will mirror the tables within the database. For our simple application the models and their fields we will need are:
- Country
- CountryID
- CountryName
- City
- CityID
- CityName
- CityPopulation
- CountryID
To add these classes, select the 'Shared' folder, right-click and select Add > Class. Enter 'Country' as the class name. (The convention is that class names should always be a noun; I prefer to use singular rather than plural, but don't think there is a definitive convention for this.)
The code for Country.cs is:
using System;
using System.Collections.Generic;
using System.Linq;
using System.Text;
using System.Threading.Tasks;

namespace BlazorCountriesWasm.Shared
{
    public class Country
    {
        public int CountryId { get; set; }
        public string CountryName { get; set; }  = String.Empty;
    }
}
and for City.cs
using System;
using System.Collections.Generic;
using System.Linq;
using System.Text;
using System.Threading.Tasks;

namespace BlazorCountriesWasm.Shared
{
    public class City
    {
        public int CityId { get; set; }
        public string CityName { get; set; } = string.Empty;
        public int CityPopulation { get; set; } = 0;
        public int CountryId { get; set; }
    }
}
A few words about API
In the next sections we are going to be mentioning 'API' quite a lot, so I thought a very brief and simplified explanation might be helpful.
API stands for 'Application Programming Interface' and is effectively the mechanism that allows two separate programs or devices to connect to each other and exchange data. An API is the messenger that sends a request from one system to another and then handles the response. In fact, 'Request' and 'Response' are terms used by APIs.
I think the video on this page of Mulesoft's website is very helpful, but don't get bogged down by the rest of their stuff!
Adding a Controller
Next question: "What is a Controller"?
Controllers are the brains of an ASP.NET Core application. They process incoming requests, perform operations on data provided through Models, and selects Views to render on the browser. Controllers are stored inside the Controllers folder in the root of the app. They are basically C# classes whose Public methods are called as Action Methods. These Action Methods handle the HTTP requests and prepare the response to be sent to the clients.
Adding a controller
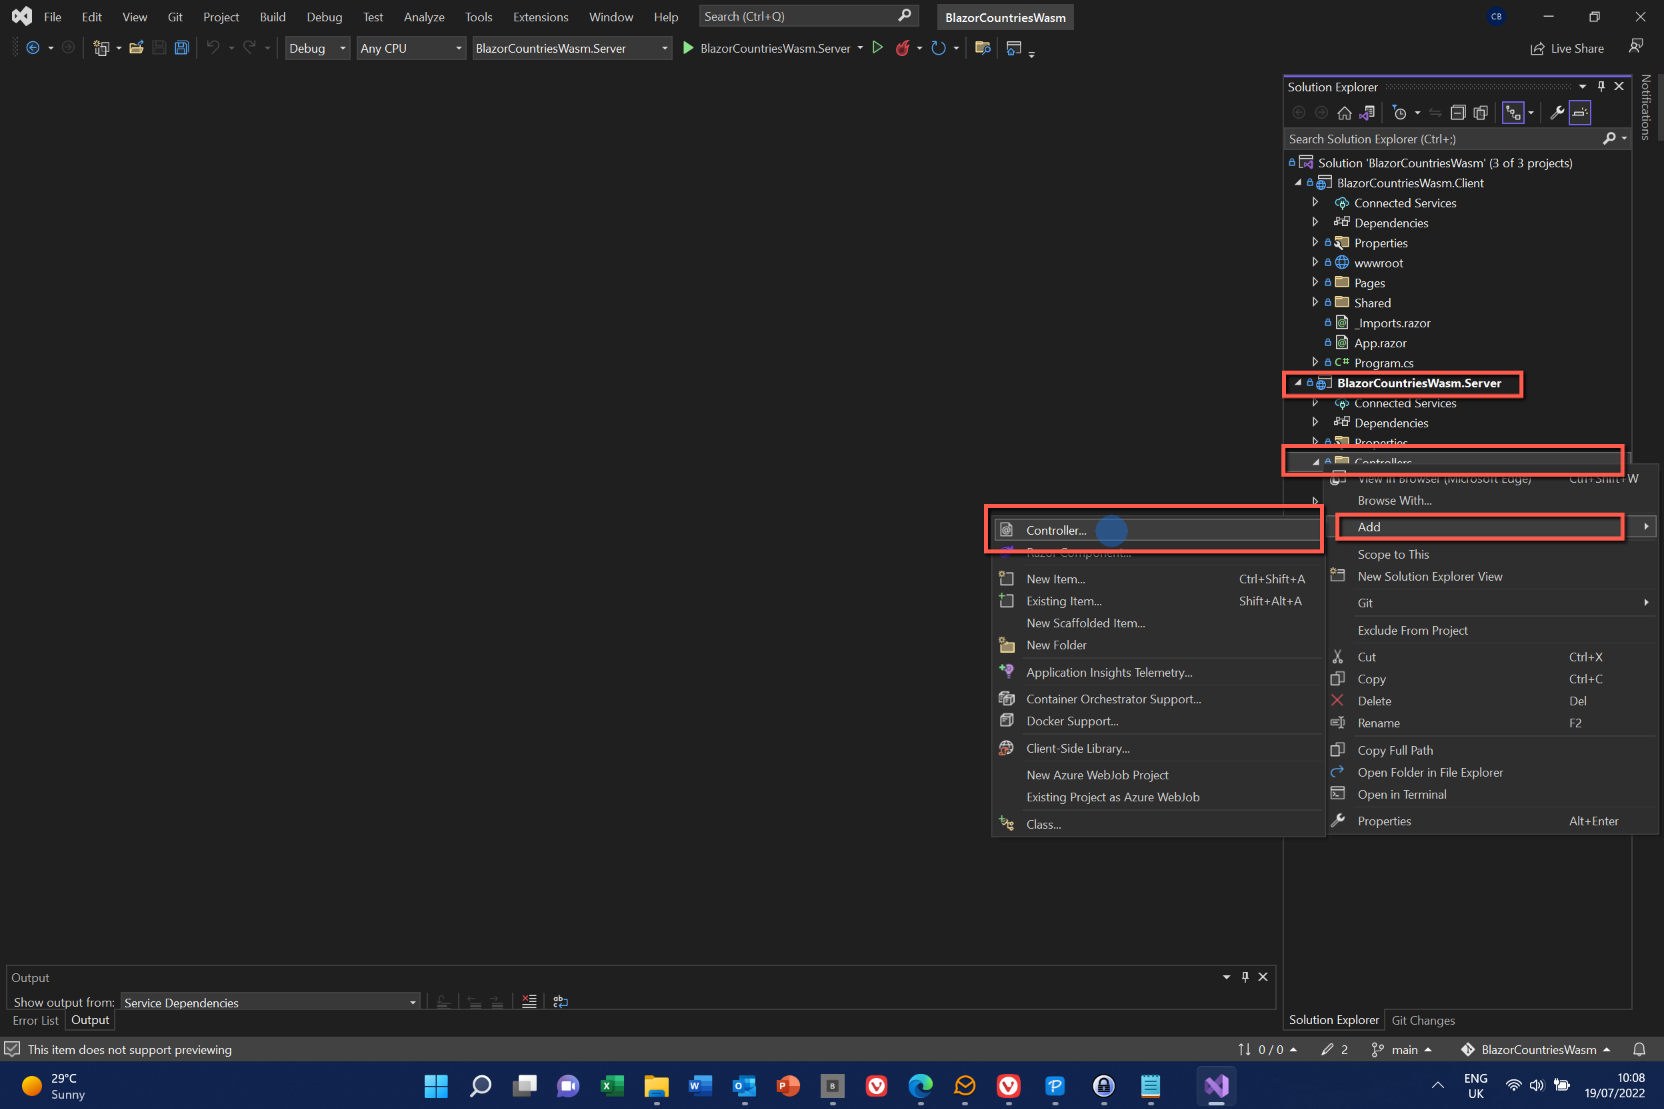
In the Server project there is a folder called 'Controllers' and the template app has already created a 'WeatherForecastController.cs' file. This is where we are going to add controllers for Countries and Cities.
- Right-click on the Controllers folder and select Add > Controller.
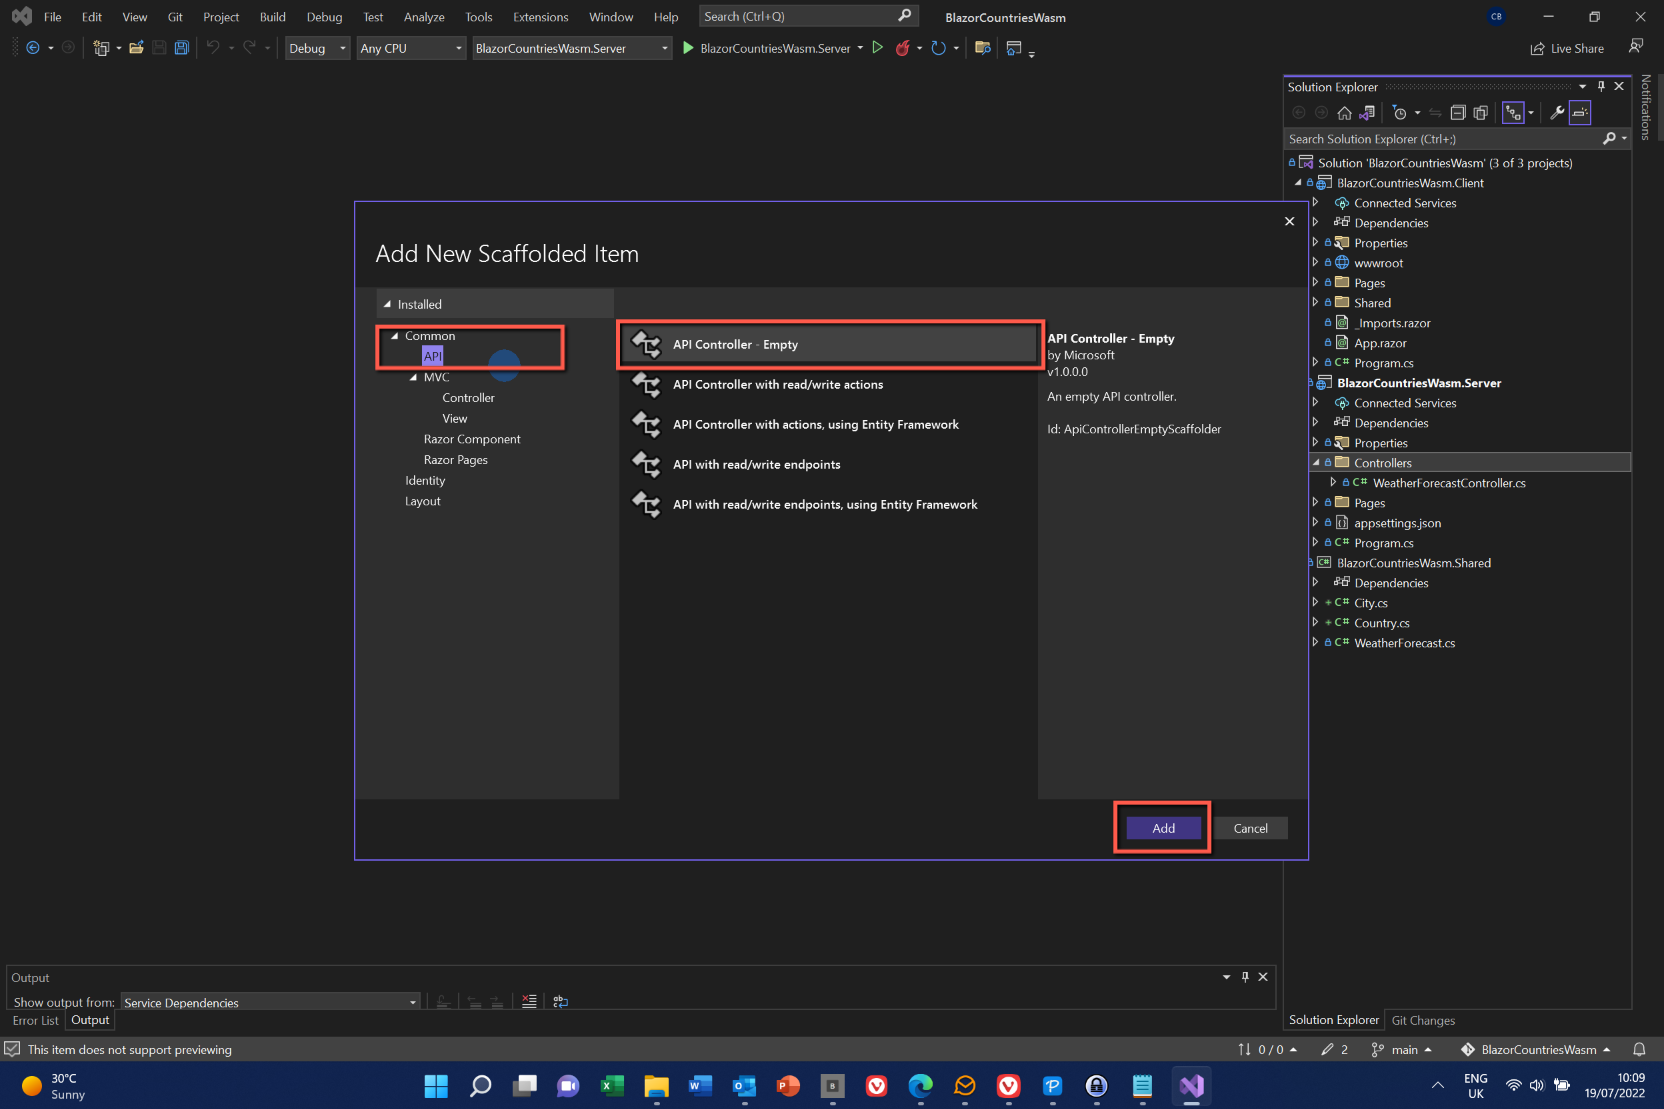
- On the next form select 'API' from the left-hand pane, and then 'API Controller - Empty' from the list. Click 'Add'
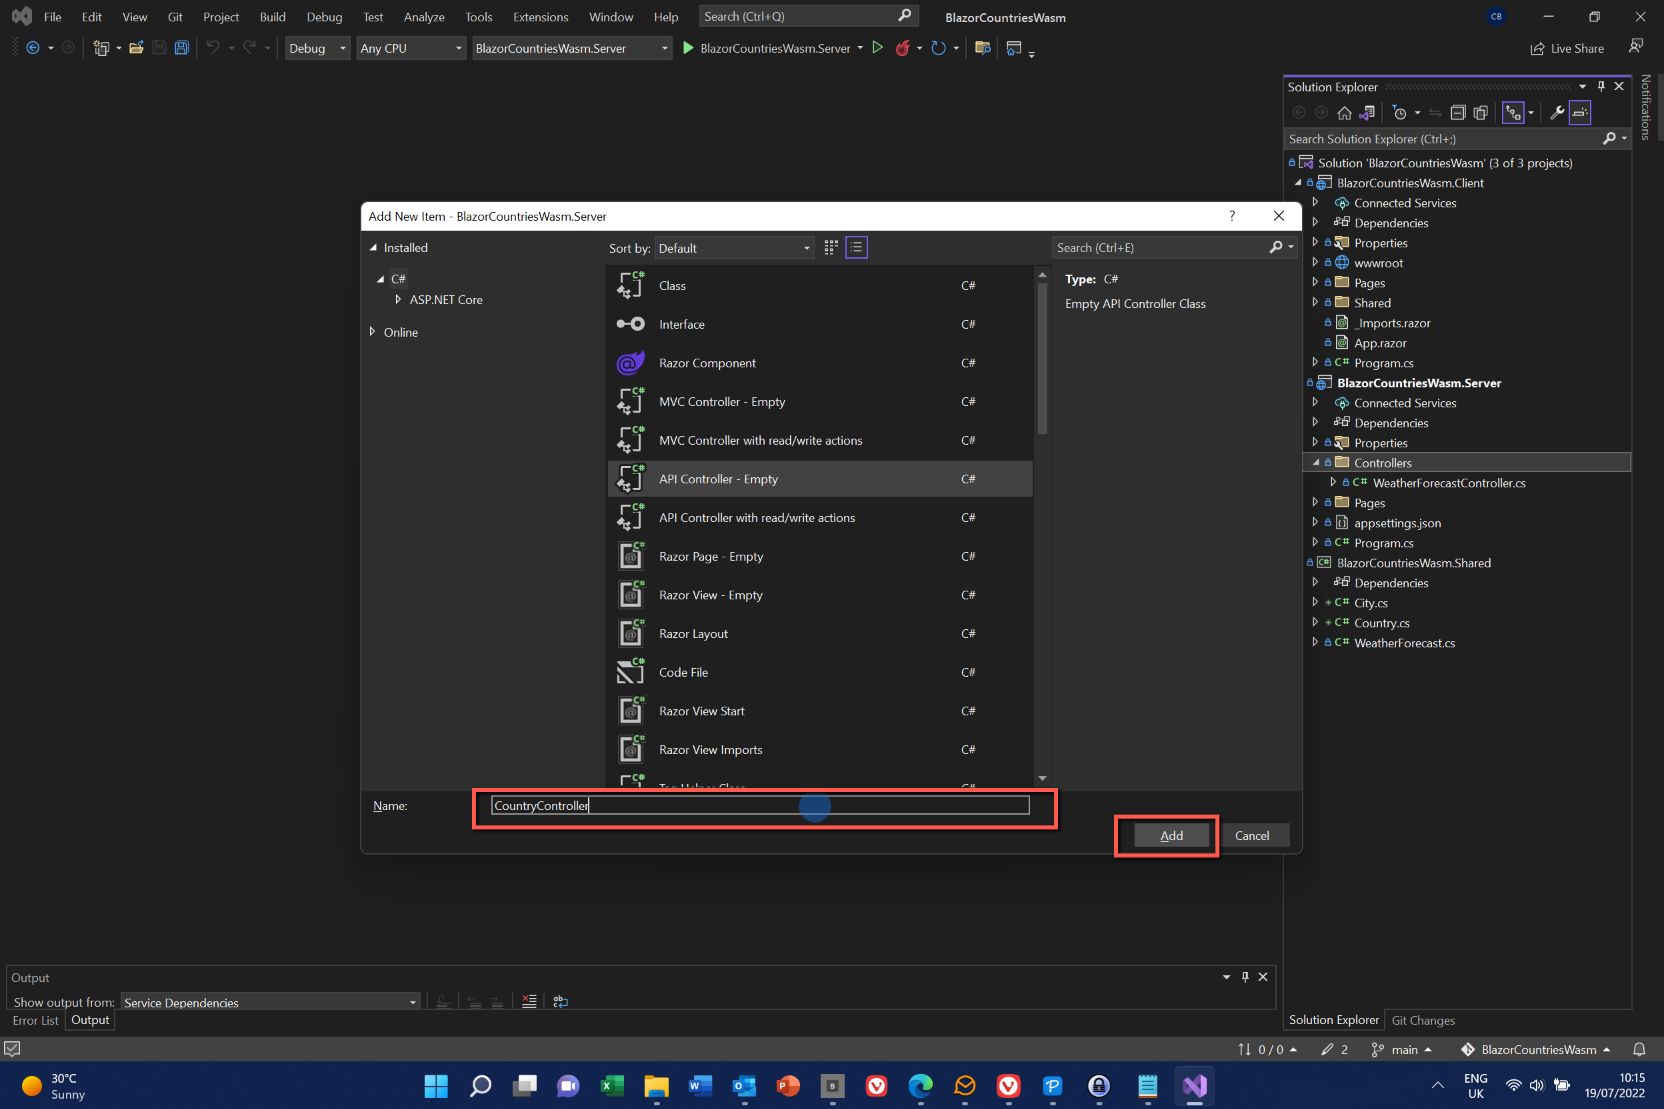
- Give the file a name, e.g. 'CountryController' and click 'Add'. (I'm torn between singular CountryController' and plural 'CountriesController', but settled for singular.)
- An empty controller template will be created.
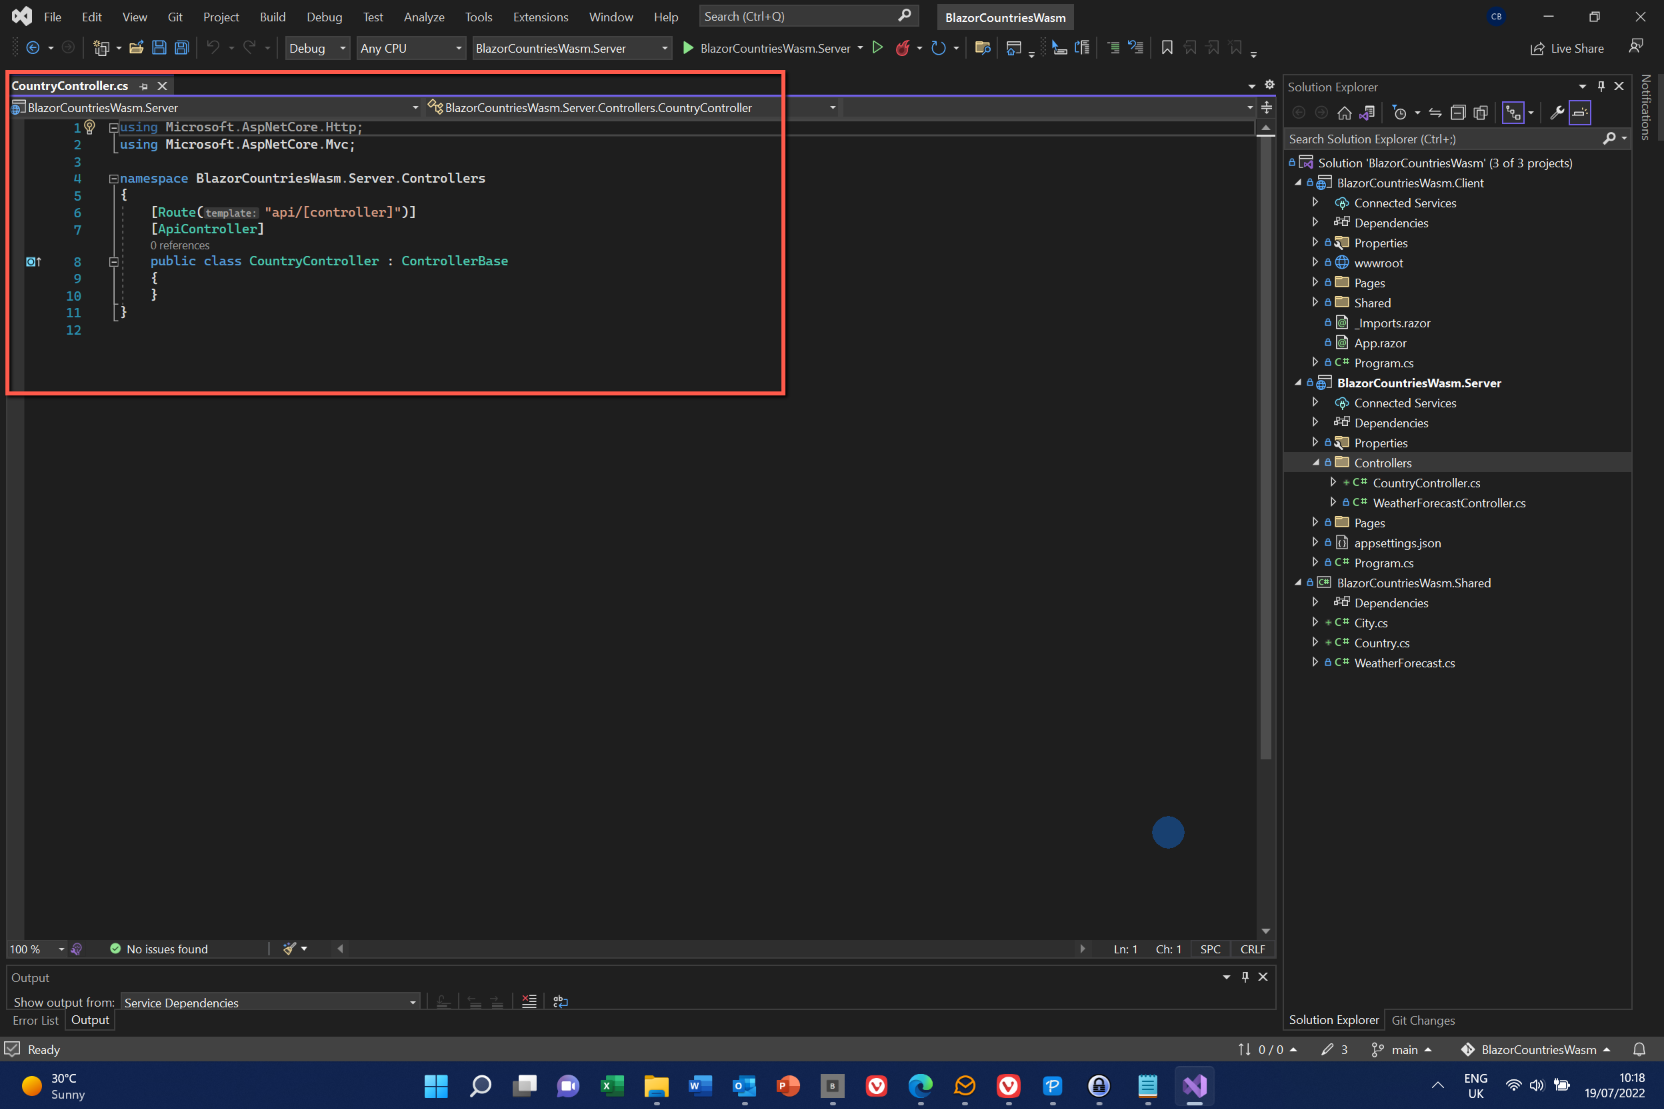
We will be adding a SQLite database later to store details of countries and cities, but we will start by using 'dummy data' entered directly in the controller.
To make our lives easier, we will be referencing the Shared folder throughout our application, so we can add the following to the top of Program.cs in the Server folder. Notice that both the Server and Client projects have a 'Program.cs' - this had me confused initially!
global using BlazorCountriesWasm.Shared;
To add dummy data for countries add the following code to the CountryController (for simplicity I have included all the code for this file).
using Microsoft.AspNetCore.Http;
using Microsoft.AspNetCore.Mvc;

namespace BlazorCountriesWasm.Server.Controllers
{
    [Route("api/[controller]")]
    [ApiController]
    public class CountryController : ControllerBase
    {
        public static List<Country> countries = new List<Country>
        {
            new Country {CountryId = 1, CountryName = "United Kingdom"},
            new Country {CountryId = 2, CountryName ="France"}
        };
    }
}
Repeat the whole process to add a 'CityController' class, adding the dummy data for cities as shown below:
using Microsoft.AspNetCore.Http;
using Microsoft.AspNetCore.Mvc;

namespace BlazorCountriesWasm.Server.Controllers
{
    [Route("api/[controller]")]
    [ApiController]
    public class CityController : ControllerBase
    {
        public static List<City> cities = new List<City>
        {
            new City
            {
                CityId = 1,
                CityName = "London",
                CityPopulation = 9000000,
                CountryId = 1
            },
            new City
            {
                CityId = 2,
                CityName = "Birmingham",
                CityPopulation = 1500000,
                CountryId = 1
            },
            new City
            {
                CityId = 3,
                CityName = "Oxford",
                CityPopulation = 250000,
                CountryId = 1
            },
            new City
            {
                CityId = 4,
                CityName = "Cambridge",
                CityPopulation = 200000,
                CountryId = 1
            },
            new City
            {
                CityId = 5,
                CityName = "Paris",
                CityPopulation = 7500000,
                CountryId = 2
            },
            new City
            {
                CityId = 6,
                CityName = "Toulouse",
                CityPopulation = 200000,
                CountryId = 2
            },
            new City
            {
                CityId = 7,
                CityName = "Grenoble",
                CityPopulation = 200000,
                CountryId = 2
            }
        };
    }
}
Modifying the Controller to get data
To get data for countries add the following immediately below the code used to generate dummy data for countries (make sure it is within 'public class CountryController : ControllerBase':
        [HttpGet]
        public async Task<ActionResult<List<Country>>> GetCountries()
        {
            return Ok(countries);
        }

        [HttpGet]
        [Route("{CountryId}")]
        //Or you can combine the two lines as: [HttpGet("{CountryId}")]
        public async Task<ActionResult<Country>> GetSingleCountry(int CountryId)
        {
            var country = countries.FirstOrDefault(c => c.CountryId == CountryId);
            if(country == null)
            {
                return NotFound("Sorry, no country found.");
            }
            else
            {
                return Ok(country);
            }
        }
There are two methods in the above code. The first will return a list of all the countries, whereas the second returns just one country where the ID of the country required is passed in as a parameter. In the first method the 'Ok' element will also return a code to indicate that the call was successful. In the method to return a single country a test is performed to check whether the relevant country has been found. If the country has not been found the value of 'country' will be null and the code for 'NotFound' will be returned together with the message "Sorry, no country found."
Similarly, for cities, the code to be added to the CityController is:
        [HttpGet]
        public async Task<ActionResult<List<City>>> GetCities()
        {
            return Ok(cities);
        }

        [HttpGet]
        [Route("{CityId}")]
        //Or you can combine the two lines as: [HttpGet("{CityId}")]
        public async Task<ActionResult<City>> GetSingleCity(int CityId)
        {
            var city = cities.FirstOrDefault(c => c.CityId == CityId);
            if (city == null)
            {
                return NotFound("Sorry, no city found.");
            }
            else
            {
                return Ok(city);
            }
        }
Testing
To test the application so far we can run the application and enter the routes in the browser address bar to access countries, cities and individual countries and cities.
- Run the application
- In the address bar enter: "/api/country" after the localhost address to display the countries (Note: it is 'country' not 'countries' after 'api/')
- To display a single country enter: "/api/country/2". Try changing '2' to, say, '9'. We should get the message that no country was found.
- Repeat with 'city' instead of 'country'.
References
The source code for the project can be found here:- Code This includes all files modified during this posting, but not those that haven't been added or modified.