Deploy to Azure
Introduction
The deployment to Azure should be simpler for our SQLite version in that we don't need to add a SQL Server and database, neither do we need to migrate the SQL Server database. The SQLIte file should simply be included in our deployment.
The steps we will take are:
- Create a new Resource Group (to make things easier if we need to delete everything!)
- Publish
- Link to Azure B2C
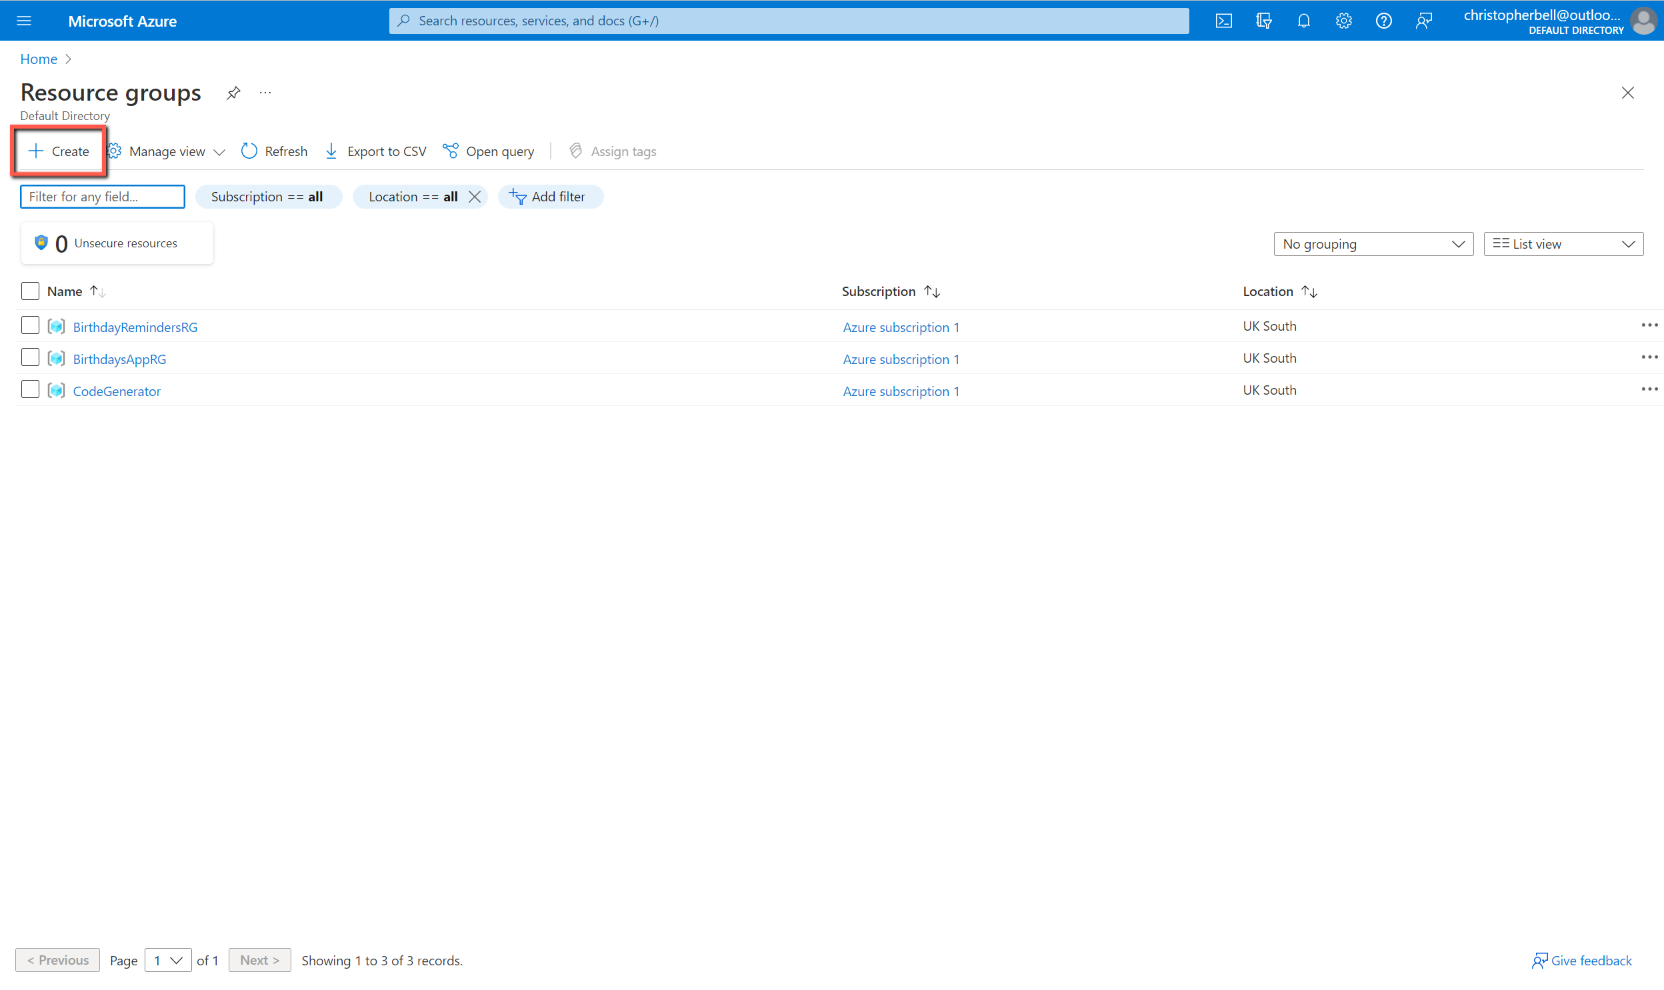
Create a Resource Group
Log into the Azure portal, and make sure you are in the 'Default Directory' (or, more specifically, not in the B2C directory.)
- Select 'Resource Groups'
- Click 'Create'
- Enter Name
- Enter Region
- Click Review & Create
- Click Create


There is no need to remain logged into Azure; log out if desired.
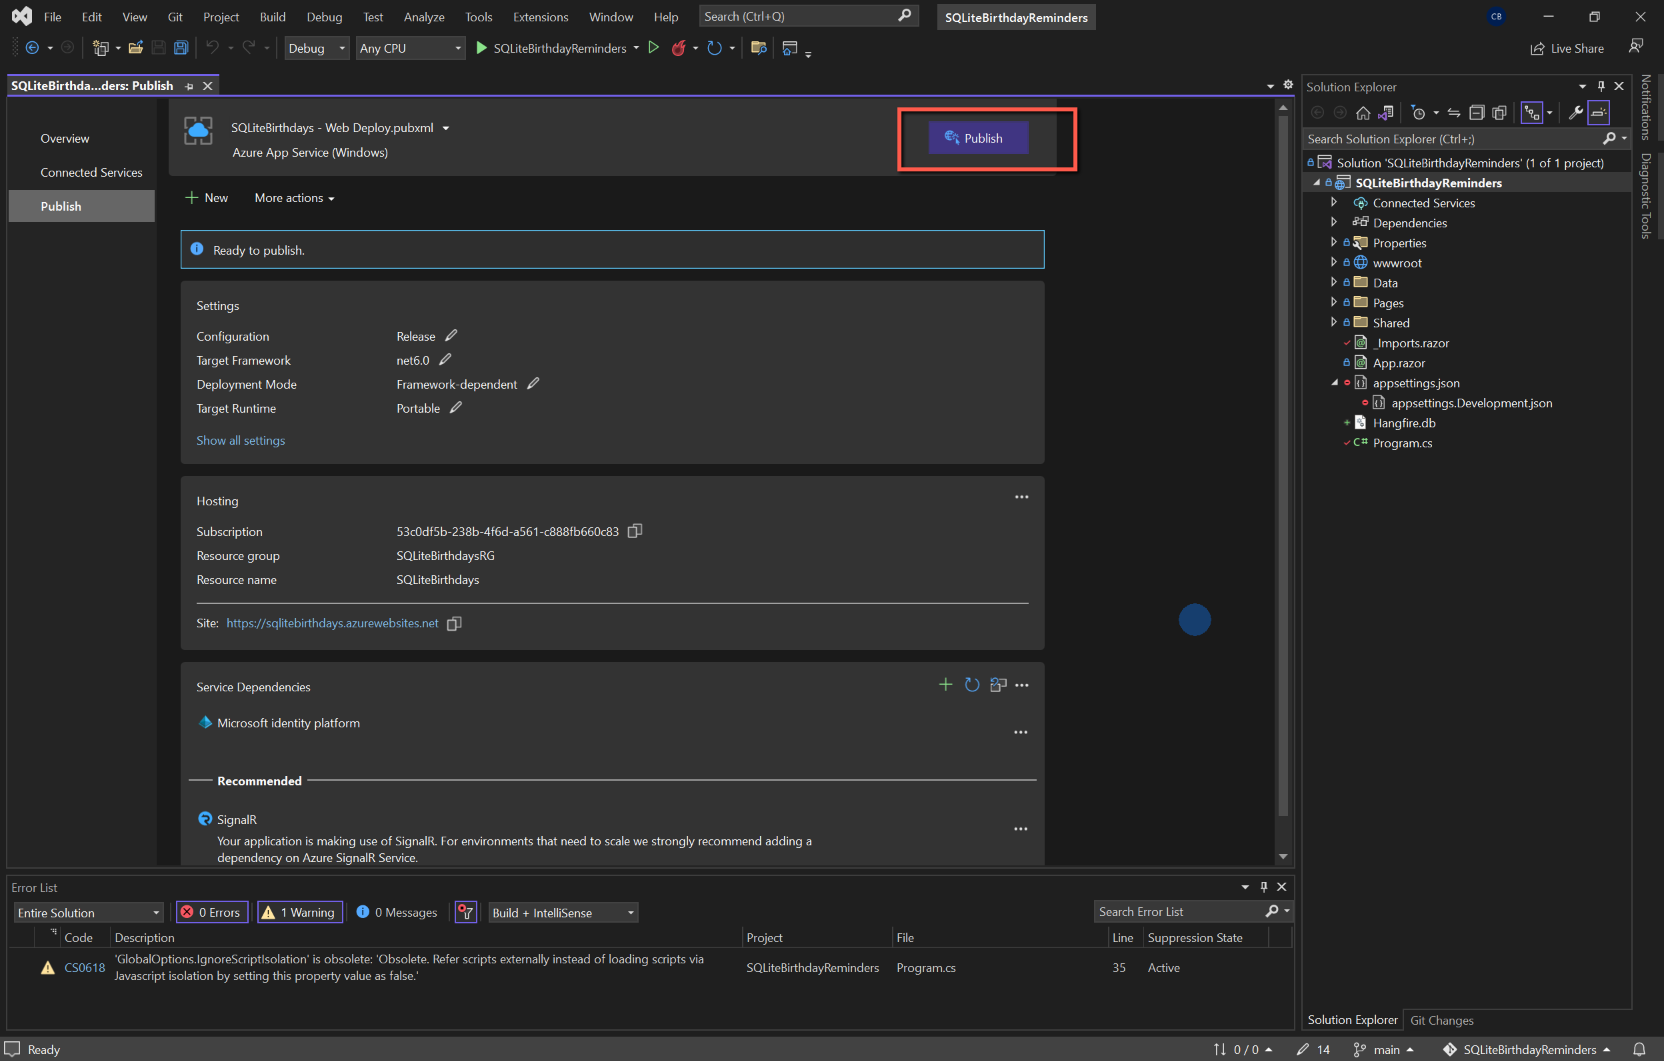
Publish the App
In Visual Studio
- Save and close all files
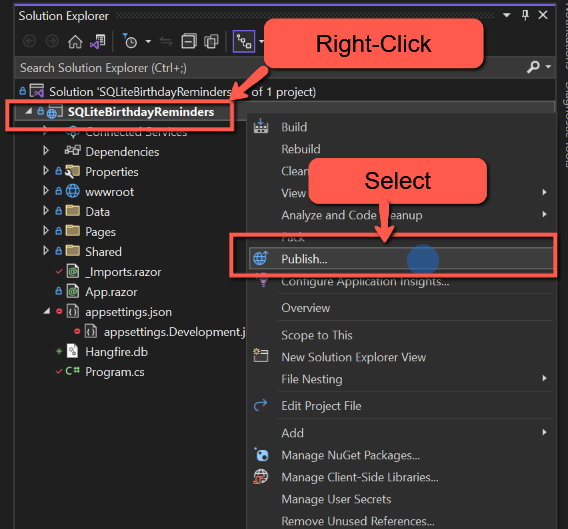
- In Solution Explorer right-click the SQLiteBirthdayReminders project and select 'Publish'
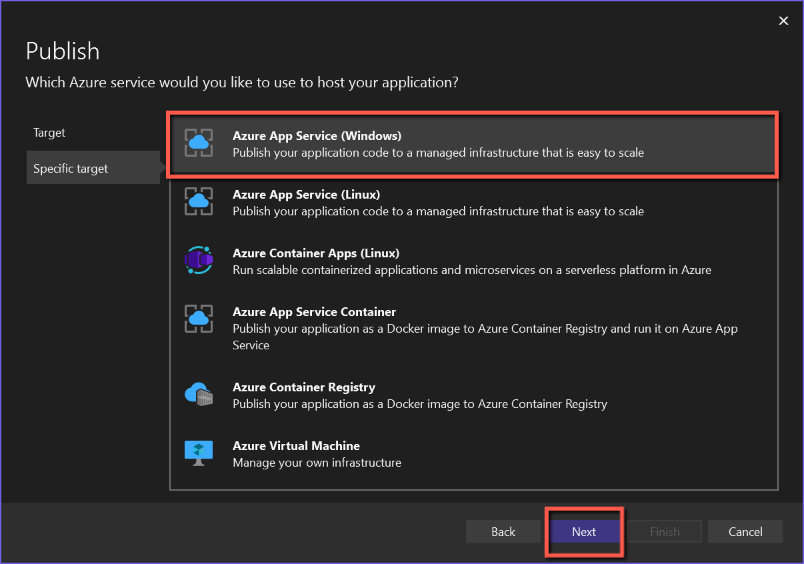
- Select 'Azure' as the 'Target' and click 'Next'
- Select 'Azure App Service (Windows)' as the 'Specific Target' and click 'Next'
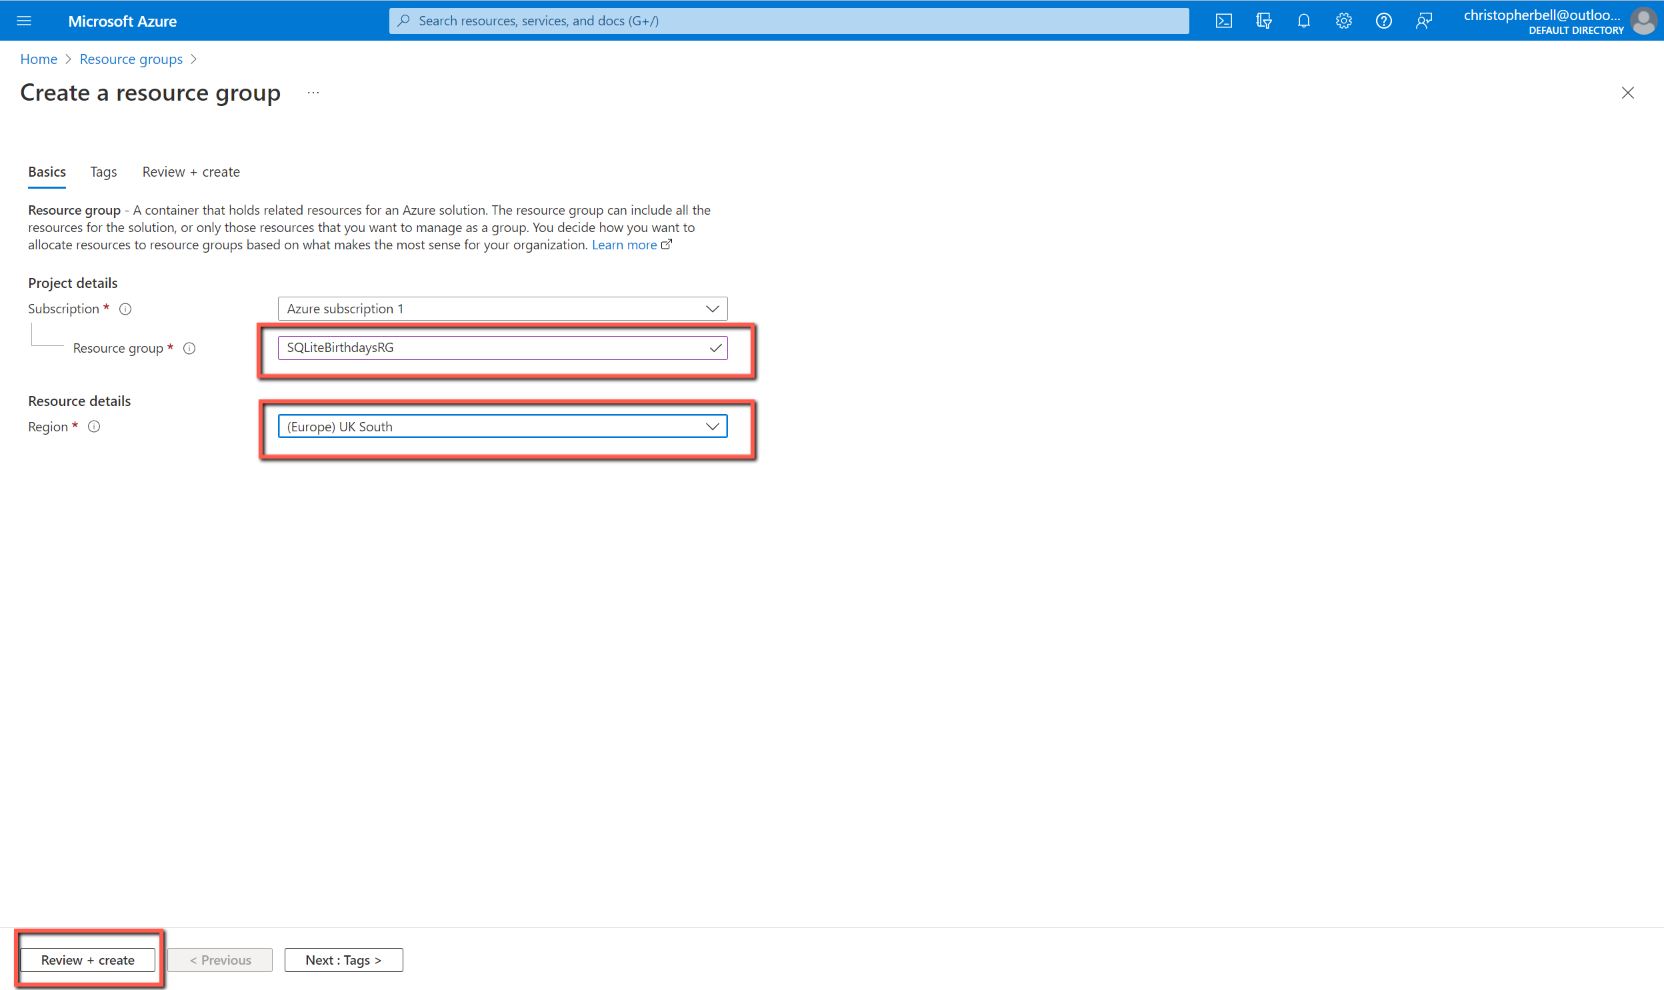
- On the App Service form
- Select the 'Subscription name' from the drop-down list ('Free Trial')
- View will have 'Resource group' - leave as is
- Leave 'Search' blank
- Click the + sign above 'App service instances'
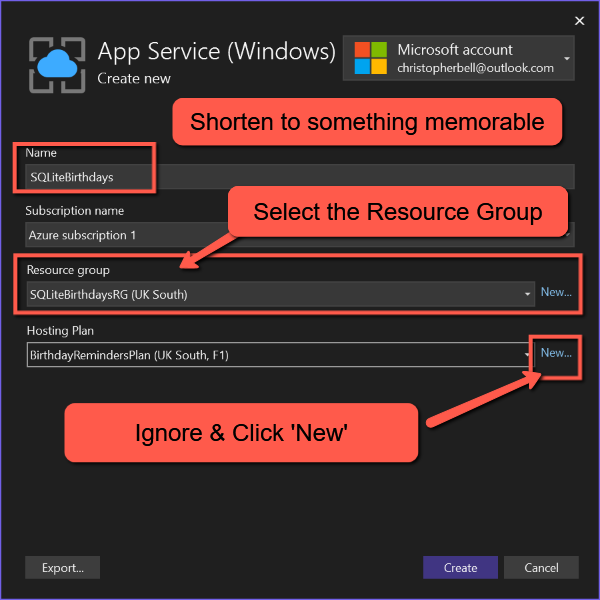
- On the 'App Service (Windows) form
- The 'Name' will be pre-populated with a name plus date/time. This can be edited to something shorter, but I believe it must be unique across Azure, so you might need to adjust the name slightly. This is the name that will prefix ".azurewebsites.net/" to create the website name, e.g. https://birthdayreminders.azurewebsites.net/
- Make sure 'Subscription name' is populated with 'Free Trial' (or select an appropriate subscription).
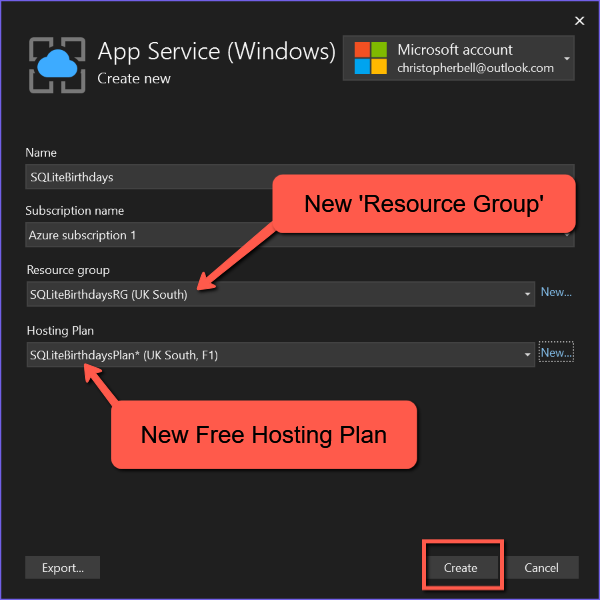
- Select 'Resource group' (the one we created earlier)
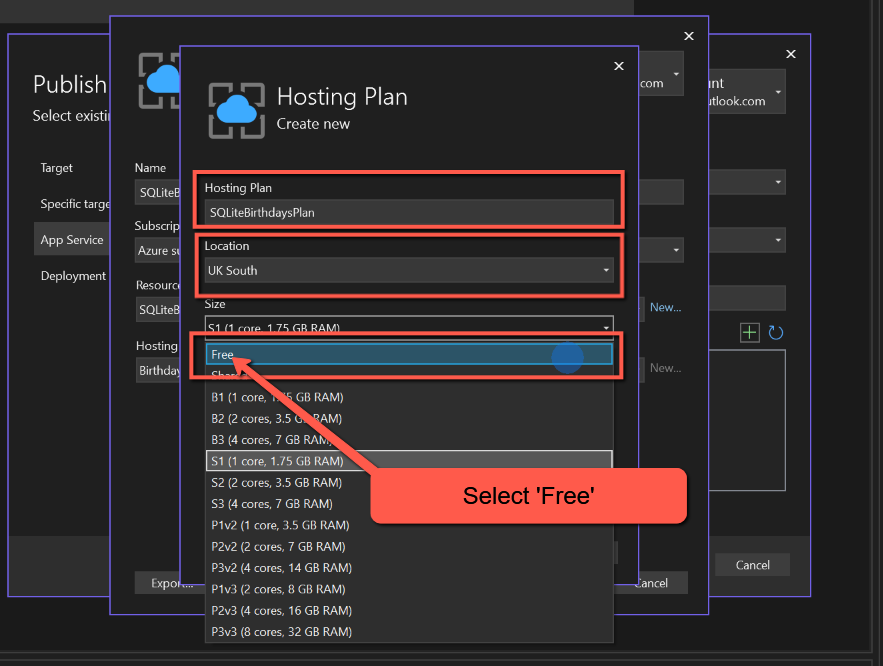
- On 'Hosting Plan' make sure you select 'New' and select a 'Free' plan with a suitable location. Edit the 'Hosting Plan' name if you want.
- Click 'Create' and you will be returned to the 'App Service' form
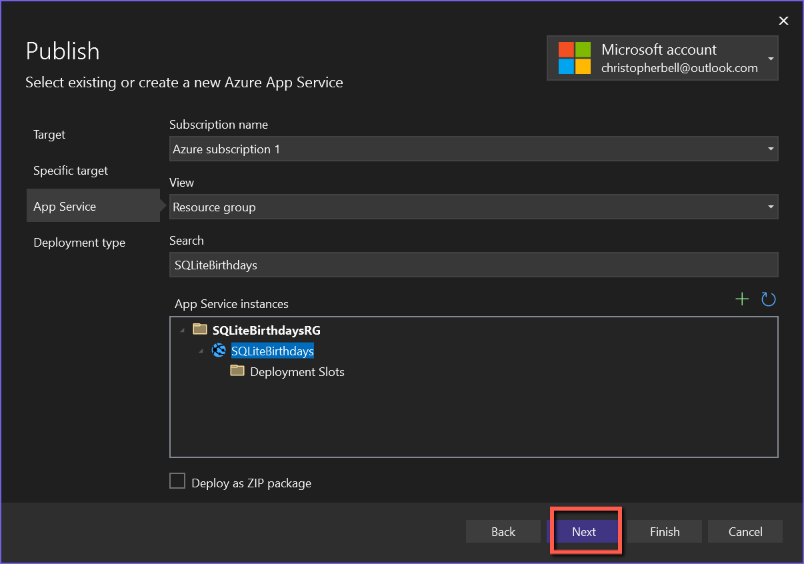
- On the App Service form click 'Next'
- On 'Deployment Type' select the top option, 'Publish (generates pubxml file)'
- Click 'Finish'
- You will be returned to the 'Publish profile creation progress' form.
- Click 'Close'
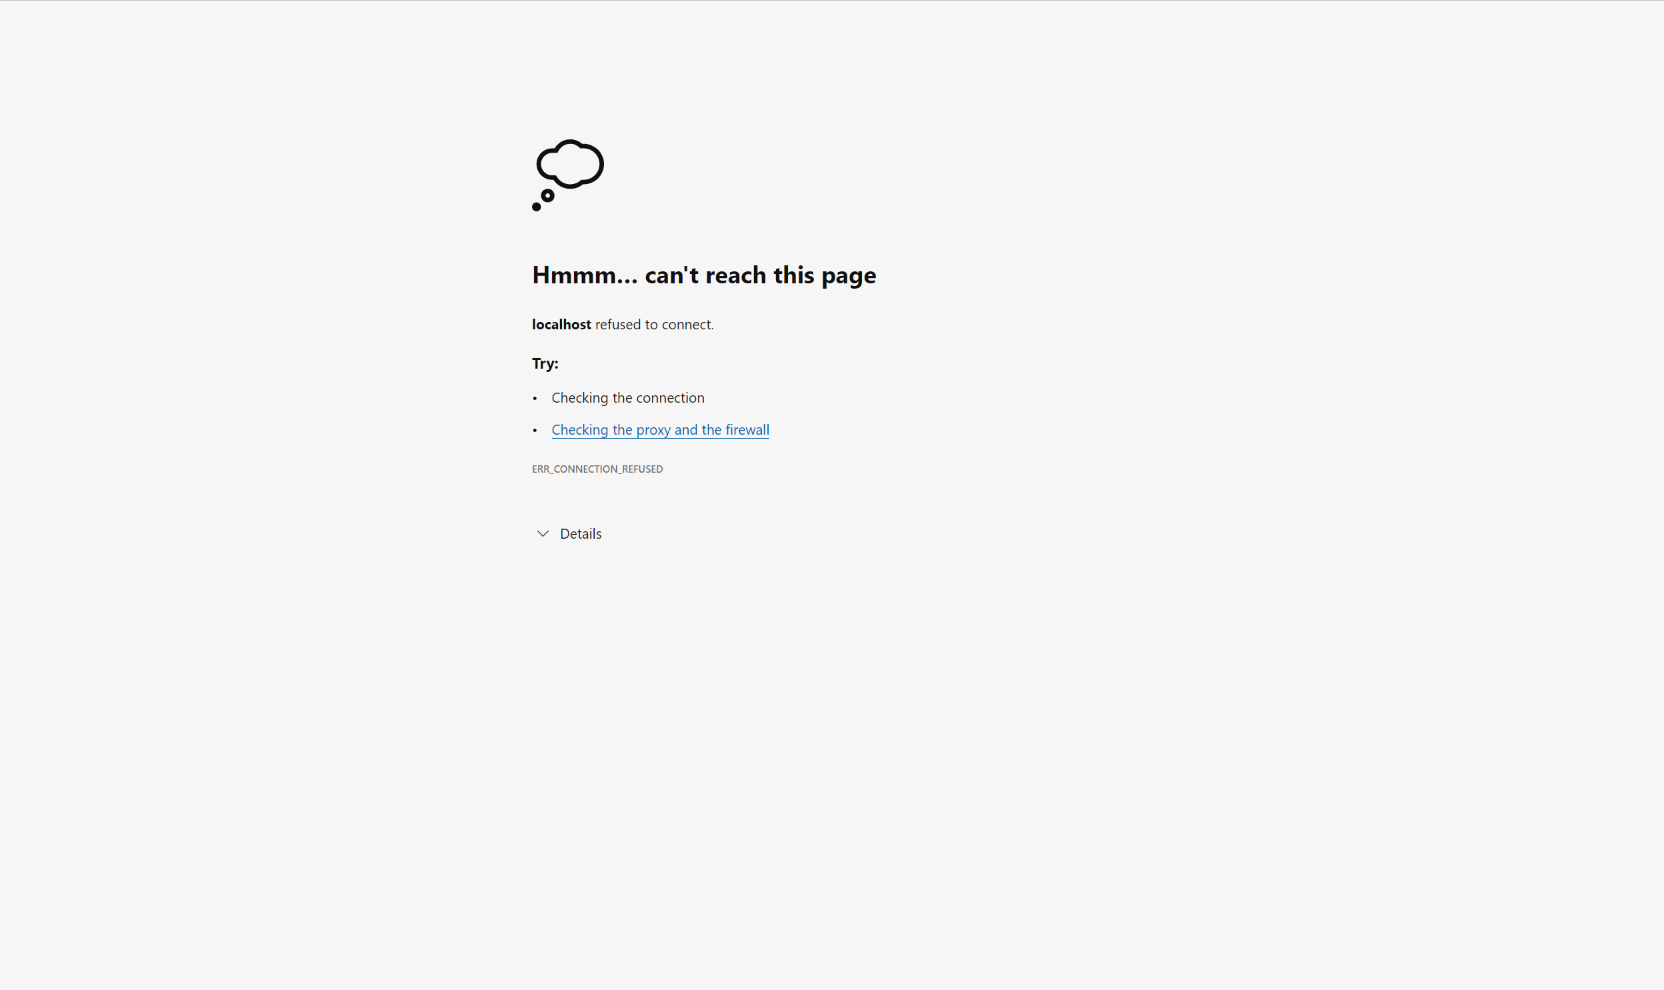
- You will be returned to the overall 'Publish' form. Clicking 'Publish' now will attempt to open the website, but will result in an error caused because the Azure B2C hasn't yet been configured for the new website.


Link Azure B2C to live site
Log into Azure Portal and
- Make sure you are in the Directory created for Azure B2C
Select
- Azure Active Directory
- App registrations
- Click on the registration for this application to open it
- Click on the link labelled 'Redirect URIs'
Expand the 'Web' section, if not already expanded - Click 'Add URI' at the bottom of the section
- In the 'Redirect URIs' box type in (or paste) the site address and append to it '/signin-oidc'.
- Click 'Save'
Save and test
Test the live application by entering the site address in a browser (or, from Visual Studio 2022 select 'Open site' from the Publish tab).
You should be presented with the Azure B2C login page and from there should be able to log into the application.
Depending on your location you may notice that the date format is not correct.
I had deliberately selected 'UK South' as the location of the Resource Group, SQL server, App Plan and App Service, so was a little surprised by the fact that dates were not displayed in UK format. Further investigation pointed to the application itself, rather than Azure. To fix the problem, I has to add the following two lines to Program.cs.
Localisation and Culture
The first line is added to the builder section:
builder.Services.AddLocalization();
And the second after app.UseRouting();
app.UseRequestLocalization("en-GB");
Re-Publish
To re-publish the app could not be simpler.
- Right-click on the project name in Solution Explorer
- Select 'Publish'
- Click the 'Publish' button at the top of the tab