Getting Started
A new approach
I would normally start a Blazor project by opening Visual Studio and creating a new Blazor server app, and then add the NuGet packages for Syncfusion controls.
This time I will try something different. After watching Matt Parker's YouTube video on Photino and MudBlazor (which I thoroughly recommend) I noticed he had created a package, available for cloning from GitHub, that incorporates both Photino and MudBlazor. This sounds like a good option!
However, when I tried to clone the repo from GitHub I managed to tie myself in knots trying to rename the solution, project and namespace. I am sure this is down to my lack of understanding of how to use GitHub rather that anything the Matt Parker did. I did manage to clone successfully Matt Parker's Directory Statistics application and think it's great!
In my searching for information about Photino I also came across a GitHub repository by Nathan Wilson that seemed to provide an answer all my questions - how to create a new Visual Studio solution/project from scratch. Here I reproduce Nathan Wilson's steps.
Creating a Photino Blazor app from the CLI
Prerequisites
- Make sure .NET 9.0 SDK is installed
- I'm using Visual Studio 2022
Create the Solution
In File Manager I created a folder in my default 'repos' directory for the new solution. I named it 'BlazorPhotinoGreetings'. This will be the name of the solution/project and namespace, so best to get this right from the start.
I used Git Bash as the command line interface, but suspect that a Windows command prompt would work just as well.
In Git Bash
- Change directory to the folder created for the solution
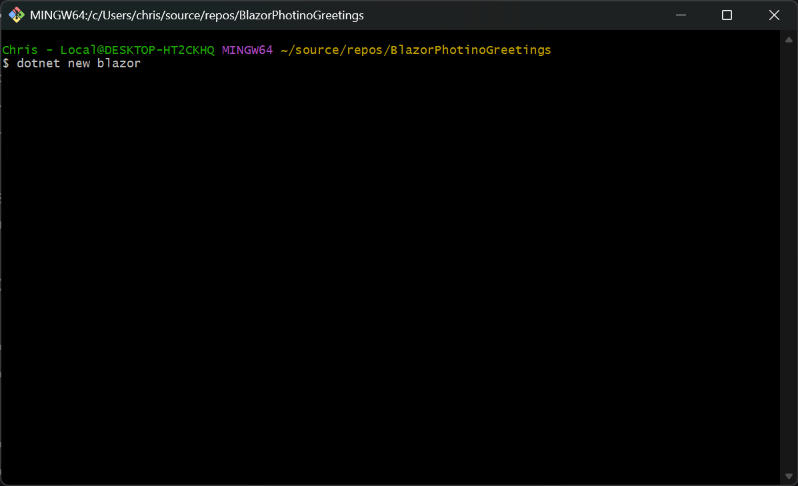
- Create the project
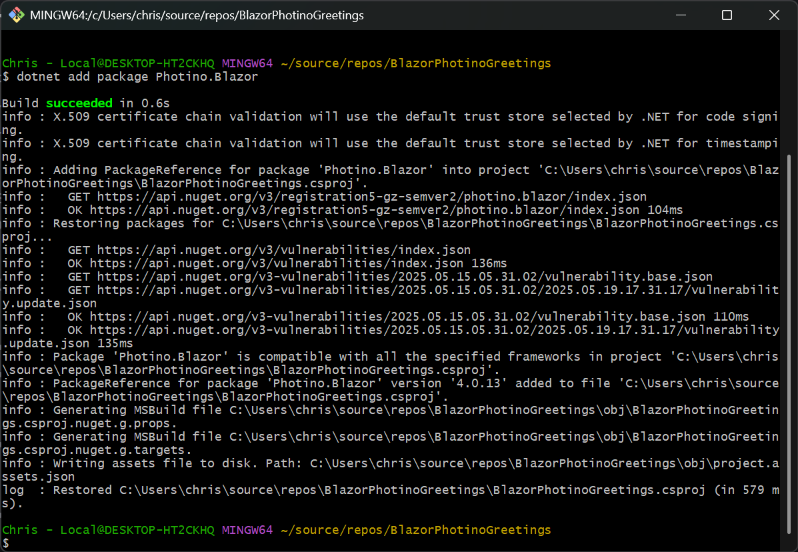
dotnet new blazor- Install Photino Blazor
dotnet add package Photino.Blazor- Could close Git Bash at this point
In File Manager browse to the project folder and open the csproj file (in my case BlazorPhotinoGreetings.csproj) with Visual Studio
In Visual Studio
- Change to wwwroot
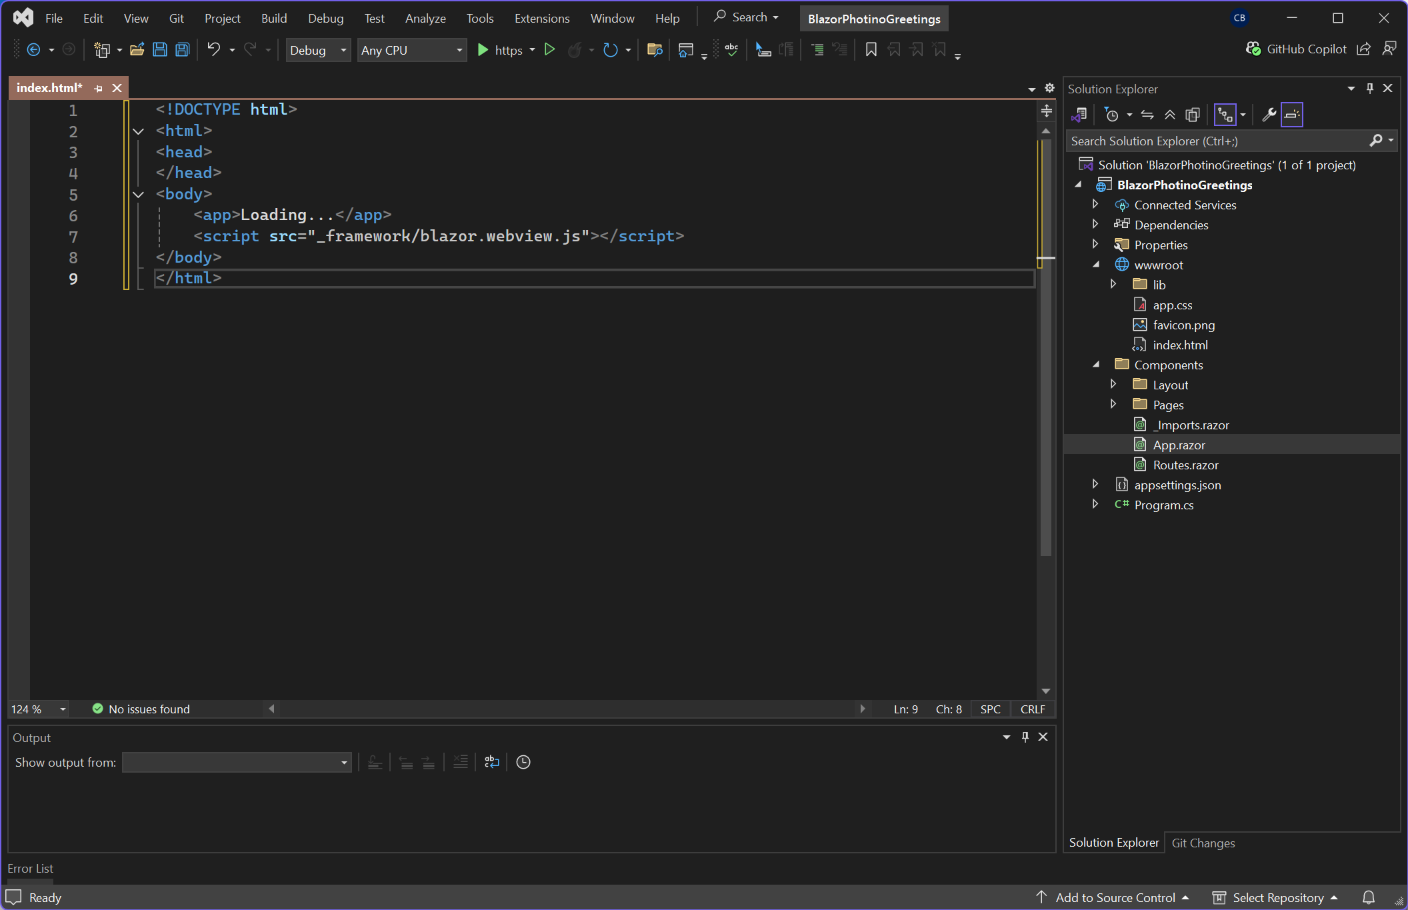
- Add a new file, call it index.html and replace all code with:
<!DOCTYPE html>
<html>
<head>
</head>
<body>
    <app>Loading...</app>
    <script src="_framework/blazor.webview.js"></script>
</body>
</html>- Update App.razor by removing the following from the <body> tag, if present
<script src="_framework/blazor.web.js"></script>- Update .csproj - replacing all code with this:
<Project Sdk="Microsoft.NET.Sdk.razor">

  <PropertyGroup>
    <OutputType>WinExe</OutputType>
    <TargetFramework>net9.0</TargetFramework>
    <Nullable>enable</Nullable>
    <ImplicitUsings>enable</ImplicitUsings>
  </PropertyGroup>

  <ItemGroup>
    <Content Update="wwwroot\**">
      <CopyToOutputDirectory>PreserveNewest</CopyToOutputDirectory>
    </Content>
  </ItemGroup>

  <ItemGroup>
    <PackageReference Include="Photino.Blazor" Version="4.0.13" />
  </ItemGroup>

</Project>- Update Program.cs - replacing all code with this:
- In the above, change the namespace to your project's name (in my case BlazorPhotinoGreetings)
- (I also had to add 'using Photino.Blazor;' at the top of the file - the only difference I found from Nathan Wilson's instructions)
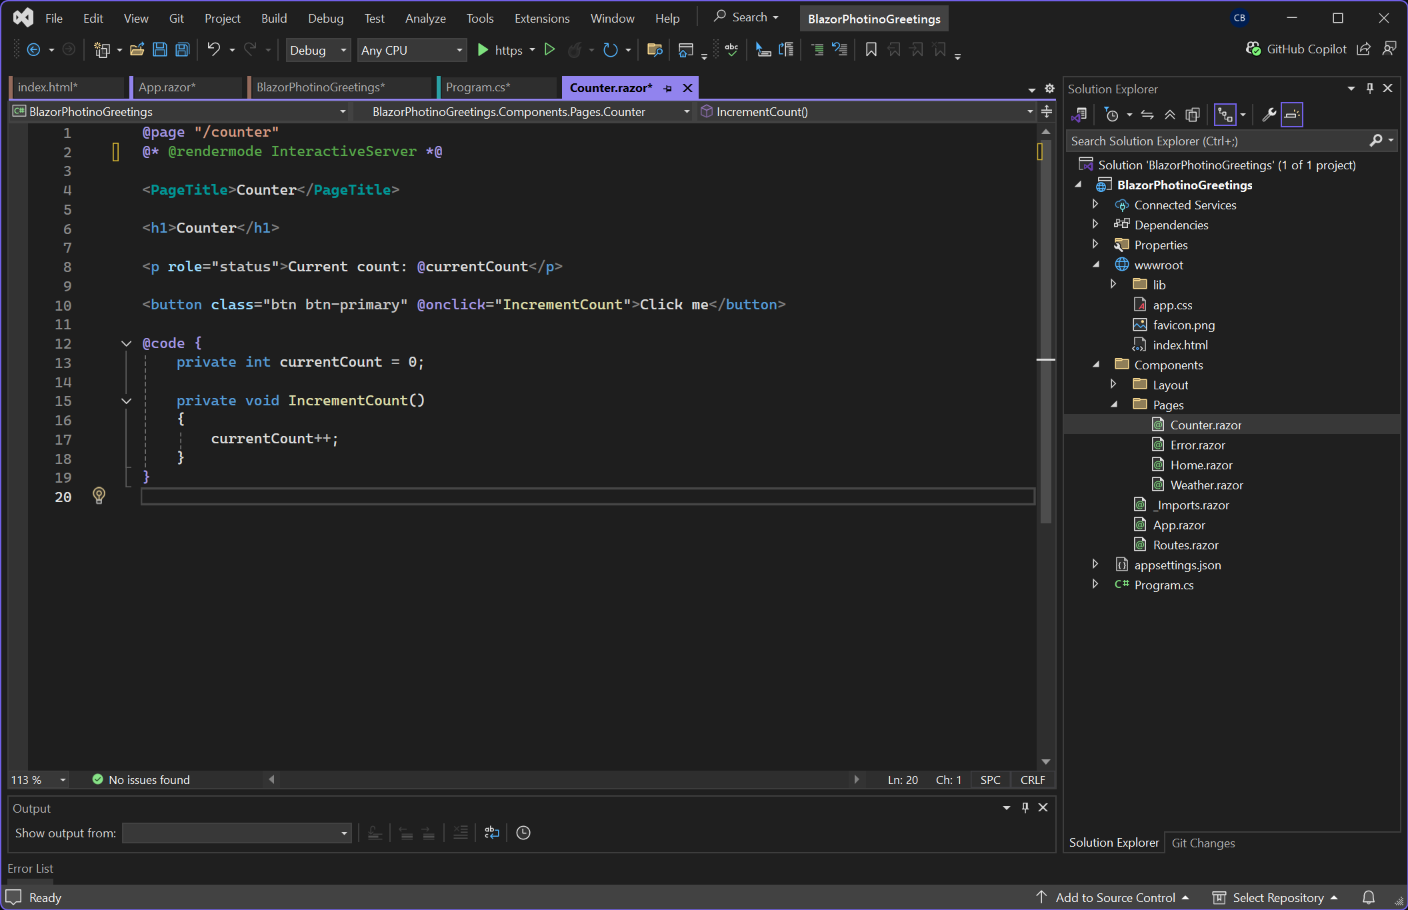
- Remove Server-side directives from Counter.razor and Weather.razor
@rendermode InteractiveServerfrom Counter.razor@attribute [StreamRendering]from Weather.razor
- Ensure .csproj uses Razor SDK:
<Project Sdk="Microsoft.NET.Sdk.razor">- Ensure Program.cs includes:
using Microsoft.Extensions.DependencyInjection;- Delete unnecessary files
- ./Components/Pages/Error.razor
- Remove <ImportMap/> from ./Components/App.razor
Save all files. This will trigger the .sln file to be saved in the solution folder in File Manager. Following the save a message will appear at the top of Visual Studio prompting a reload; click the reload button.
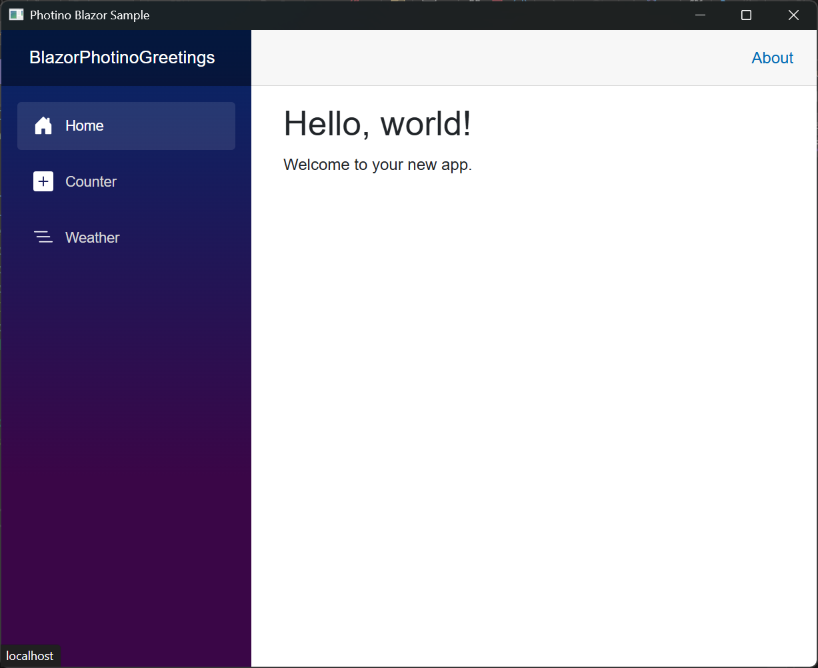
With all files saved and the project re-loaded, run the application from Visual Studio.







Alternative ways of running the application
- From the command line (e.g. Git Bash) and from the solution folder
- dotnet run
- dotnet publish -c Release
- dotnet publish -c Release -p:PulishReadyToRun=true
The first option just runs the application
Caution: The following might be wrong!
The second option publishes files to a sub-folder called bin\Release\net9.0\publish. I believe that copying all these files to a separate PC with the .NET 9 SDK installed will allow the .exe file to be double-clicked to be run.
The third option publishes files to a sub-folder called bin\Release\net9.0\win-x64\publish. I understand that this is basically the same as the second option, but makes the compilation 'Ready to Run'. This makes the application start faster and can help on low powered machines.
Install MudBlazor
To install MudBlazor follow these steps.
- In Git Bash (in the solution folder)
dotnet add package MudBlazor- Add the following line to your ./Components/_Imports.razor:
@using MudBlazor- In the HTML <head> section of ./Components/App.razo), add:
<link href="https://fonts.googleapis.com/css?family=Roboto:300,400,500,700&display=swap" rel="stylesheet" />
<link href="_content/MudBlazor/MudBlazor.min.css" rel="stylesheet" />- At the end of the HTML <body> section, add the MudBlazor JS script:
<script src="_content/MudBlazor/MudBlazor.min.js"></script>
- Update Program.cs by adding:
using MudBlazor.Services;

// Add MudBlazor services
appBuilder.Services.AddMudServices();- In MainLayout.razor, include these providers:
@* Required Providers *@
<MudThemeProvider />
<MudPopoverProvider />

@* Optional Providers *@
<MudDialogProvider />
<MudSnackbarProvider />


Save all files and run the project to ensure it still runs.
Implement MudBlazor
This will have installed MudBlazor, but so far will not have changed the application's appearance. To swap to the 'conventional' MudBlazor menu we need to make the following changes:
Program.cs
After var app = appBuilder.Build();), replace app.MainWindow.SetTitle("Photino Blazor Sample"); with:
app.MainWindow
			.SetSize(1500, 1000)
			.SetDevToolsEnabled(true)
			.SetLogVerbosity(0)
			//.SetIconFile("favicon.ico")
.SetTitle("Greetings Email");- .SetSize(1500, 1000): determines the size of the application window in pixels.
- .SetDevToolsEnabled(true) provides access to browser developer tools, used typically when access to normal debug tools is more restricted
- .SetLogVerbosity(0) suppresses most logging and can slightly improve performance
- .SetIconFile("favicon.ico") If a favicon.ico is placed in the root directory of the application it will be displayed in the window title bar
- .SetTitle("Greetings Email") The title displayed in the window title bar
AppThemeProvider.cs
Add a new file called AppThemeProvider.cs in the project folder, and insert the following (adjusting the namespace if necessary):
using MudBlazor;

namespace BlazorPhotinoGreetings;

public static class AppThemeProvider
{
	public static MudTheme GetTheme()
	{
		var theme = new MudTheme();
		theme.Typography.H5.FontSize = "1.4rem";
		theme.Typography.H5.FontWeight = "500";
		theme.Typography.H6.FontSize = "1.1rem";
		return theme;
	}
}
NavMenu.razor
Replace the existing code with:
<MudNavMenu>
    <MudNavLink Href="/" Icon="@Icons.Material.Filled.Home" Match="NavLinkMatch.All">Home</MudNavLink>
    <MudNavLink Href="/counter" Icon="@Icons.Material.Filled.Folder" Match="NavLinkMatch.Prefix">Counter</MudNavLink>
    <MudNavLink Href="/weather" Icon="@Icons.Material.Filled.Folder" Match="NavLinkMatch.Prefix">Weather</MudNavLink>
</MudNavMenu>
MainLayout.razor
Replace the existing code with:
@inherits LayoutComponentBase

<MudThemeProvider Theme="@AppThemeProvider.GetTheme()" />
<MudPopoverProvider />
<MudDialogProvider />
<MudSnackbarProvider />

<MudLayout>
	<MudAppBar Dense="true">
		<MudIconButton Icon="@Icons.Material.Filled.Menu" Color="Color.Inherit" Edge="Edge.Start" OnClick="@((e) => DrawerToggle())" />
	</MudAppBar>
	<MudDrawer @bind-Open="@_drawerOpen">
		<MudDrawerHeader>
			<MudStack Row="false" Justify="Justify.Center">
				<MudText Typo="Typo.h5">Email Greetings</MudText>
			</MudStack>
		</MudDrawerHeader>
		<NavMenu />
	</MudDrawer>
	<MudMainContent>
		<MudContainer Class="px-8 py-6">
			@Body
		</MudContainer>
	</MudMainContent>
</MudLayout>

@code {
	bool _drawerOpen = true;

	void DrawerToggle()
	{
		_drawerOpen = !_drawerOpen;
	}
}
App.razor
Replace the existing code with:
@using BlazorPhotinoGreetings.Components.Layout

<Router AppAssembly="@typeof(Program).Assembly">
	<Found Context="routeData">
		<RouteView RouteData="@routeData" DefaultLayout="@typeof(MainLayout)" />
	</Found>
	<NotFound>
		<PageTitle>Not found</PageTitle>
		<LayoutView Layout="@typeof(MainLayout)">
			<p role="alert">Sorry, there's nothing at this address.</p>
		</LayoutView>
	</NotFound>
</Router>

@code
{

}
Index.html
Replace the existing code with:
<!DOCTYPE html>
<html>
<head>
    <meta charset="utf-8" />
    <meta name="viewport" content="width=device-width, initial-scale=1.0, maximum-scale=1.0, user-scalable=no" />
    <base href="/" />
    <link href="https://fonts.googleapis.com/css?family=Roboto:300,400,500,700&display=swap" rel="stylesheet" />
    <link href="_content/MudBlazor/MudBlazor.min.css" rel="stylesheet" />
    <link href="css/app.css" rel="stylesheet" />
    <link href="BlazorPhotinoGreetings.styles.css" rel="stylesheet" />
</head>
<body>
    <app>Loading...</app>

    <div id="blazor-error-ui">
        An unhandled error has occurred.
        <a href="" class="reload">Reload</a>
        <a class="dismiss">🗙</a>
    </div>

    <script src="_framework/blazor.webview.js"></script>
    <script src="_content/MudBlazor/MudBlazor.min.js"></script>
</body>
</html>
Adding MudBlazor icon (favicon.ico)
- To download the MudBlazor icon browse to this link and download the raw file (download symbol).
- Once downloaded, copy and paste into the solution folder (i.e. same folder as Program.cs)
- Uncomment
.SetIconFile("favicon.ico")in Program.cs
- In the .csproj file insert:
   <ItemGroup>
    <Content Include="favicon.ico">
      <CopyToOutputDirectory>PreserveNewest</CopyToOutputDirectory>
      <ExcludeFromSingleFile>true</ExcludeFromSingleFile>
      <CopyToPublishDirectory>PreserveNewest</CopyToPublishDirectory>
    </Content>
  </ItemGroup>
Use MudBlazor in razor pages
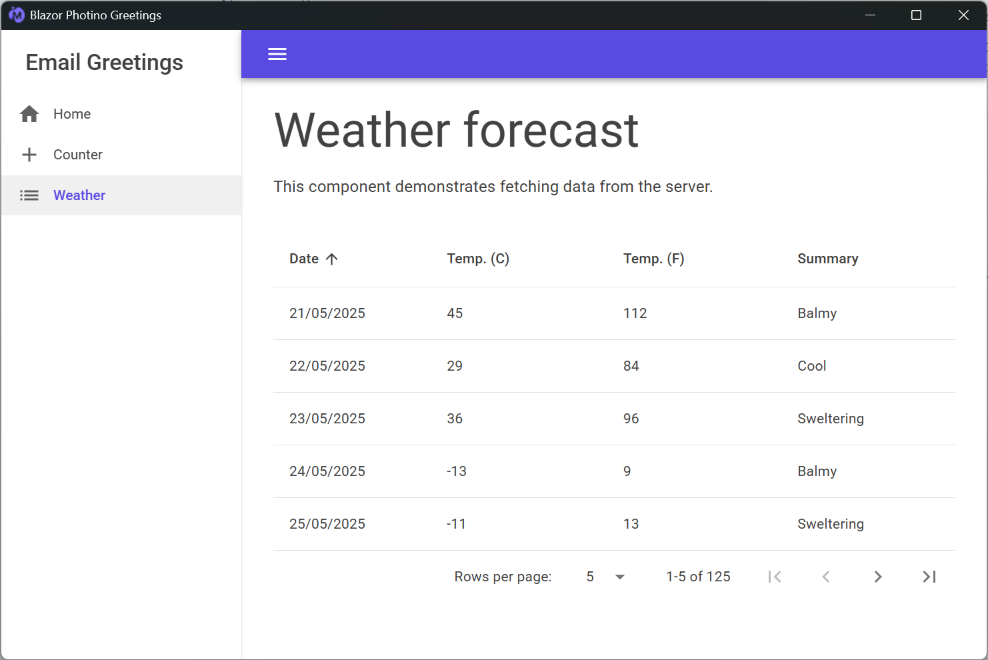
Optionally we can make the Counter and Weather pages use MudBlazor to make the application have a consistent appearance. (The changes we made to MainLayout will have removed some 'formatting' from these pages.) These examples have been taken from the MudBlazor GitHub examples.
Counter.razor
Replace the code with:
@page "/counter"

<PageTitle>Counter</PageTitle>

<MudText Typo="Typo.h3" GutterBottom="true">Counter</MudText>

<MudText Typo="Typo.body1" Class="mb-4">Current count: @currentCount</MudText>

<MudButton Color="Color.Primary" Variant="Variant.Filled" @onclick="IncrementCount">Click me</MudButton>

@code {
    private int currentCount = 0;

    private void IncrementCount()
    {
        currentCount++;
    }
}
Weather.razor
Replace the code with:
@page "/weather"

<PageTitle>Weather</PageTitle>

<MudText Typo="Typo.h3" GutterBottom="true">Weather forecast</MudText>
<MudText Typo="Typo.body1" Class="mb-8">This component demonstrates fetching data from the server.</MudText>

@if (forecasts == null)
{
    <MudProgressCircular Color="Color.Default" Indeterminate="true" />
}
else
{
    <MudTable Items="forecasts" Hover="true" SortLabel="Sort By" Elevation="0" AllowUnsorted="false">
        <HeaderContent>
            <MudTh><MudTableSortLabel InitialDirection="SortDirection.Ascending" SortBy="new Func<WeatherForecast, object>(x => x.Date)">Date</MudTableSortLabel></MudTh>
            <MudTh><MudTableSortLabel SortBy="new Func<WeatherForecast, object>(x => x.TemperatureC)">Temp. (C)</MudTableSortLabel></MudTh>
            <MudTh><MudTableSortLabel SortBy="new Func<WeatherForecast, object>(x => x.TemperatureF)">Temp. (F)</MudTableSortLabel></MudTh>
            <MudTh><MudTableSortLabel SortBy="new Func<WeatherForecast, object>(x => x.Summary!)">Summary</MudTableSortLabel></MudTh>
        </HeaderContent>
        <RowTemplate>
            <MudTd DataLabel="Date">@context.Date</MudTd>
            <MudTd DataLabel="Temp. (C)">@context.TemperatureC</MudTd>
            <MudTd DataLabel="Temp. (F)">@context.TemperatureF</MudTd>
            <MudTd DataLabel="Summary">@context.Summary</MudTd>
        </RowTemplate>
        <PagerContent>
            <MudTablePager PageSizeOptions="new int[] { 5, 50, 100 }" />
        </PagerContent>
    </MudTable>
}

@code {
    private WeatherForecast[]? forecasts;

    protected override async Task OnInitializedAsync()
    {
        // Simulate asynchronous loading to demonstrate a loading indicator
        await Task.Delay(500);

        var startDate = DateOnly.FromDateTime(DateTime.Now);
        var summaries = new[] { "Freezing", "Bracing", "Chilly", "Cool", "Mild", "Warm", "Balmy", "Hot", "Sweltering", "Scorching" };
        forecasts = Enumerable.Range(1, 125).Select(index => new WeatherForecast
        {
            Date = startDate.AddDays(index),
            TemperatureC = Random.Shared.Next(-20, 55),
            Summary = summaries[Random.Shared.Next(summaries.Length)]
        }).ToArray();
    }

    private class WeatherForecast
    {
        public DateOnly Date { get; set; }
        public int TemperatureC { get; set; }
        public string? Summary { get; set; }
        public int TemperatureF => 32 + (int)(TemperatureC / 0.5556);
    }
}
Save all files and run the application.