Data Validation
So far we haven't added any data validation to our project. It is a fact of life, however, that unless we guard against invalid data being entered into our application users will find a way of breaking it!
There are two approaches we can take to data validation; we can use the inbuilt .Net DataAnnotations and/or we can code our own validation before a record is saved, for example, or we could use a combination of the two. At this stage DataAnnotations is the simplest and should provide the protection we require.
DataAnnotations
Data validation using 'Data Annotations' has two basic steps:
- Editing the data model.cs
- Adding 'using System.ComponentModel.DataAnnotations;'
- Adding data 'rules' to the data columns
- Adding validation messages to the data columns
- Editing the data entry form
- Adding <DataAnnotationsValidator />
to the <EditForm> block Adding error message placeholders for each column being validated to the <EditForm> block
Data Model
The code generated by Alan Simpson's code generator automatically adds the following to data table model code (so we don't have to):
using System.ComponentModel.DataAnnotations;Alan Simpson's code generator also decorates the columns with attributes such as [Required] and [StringLength (50)], again helping us with the essentials.
DataAnnotations also allows us to add other requirements which will help with validation; the most important (for us) are [Range], which defines a range for numeric data, [Email] which checks that email addresses are in the correct format, and [MinimumLength] that ensures strings have a minimum length.
It is not an absolute requirement to add an error message to the data model columns being checked. If no message is added to the data model and no message placeholder is added to the <EditForm>, and an error is encountered the input box will (normally) be outlined in red. This will let the user know there is a problem, but not what it is. It could be a required field, or it could exceed the maximum length, for example, but the user won't know.


Not adding an error message to the model, but adding an error message placeholder on the form will let the user know what the problem is, but will use the data model column name - the user will probably be able to tell which field it is, but it is much better to avoid any doubt.
Having an error message defined in the model class and an error message placeholder provides the best of both worlds.


The examples below show the changes to the Product and Supplier data models.


Razor Pages
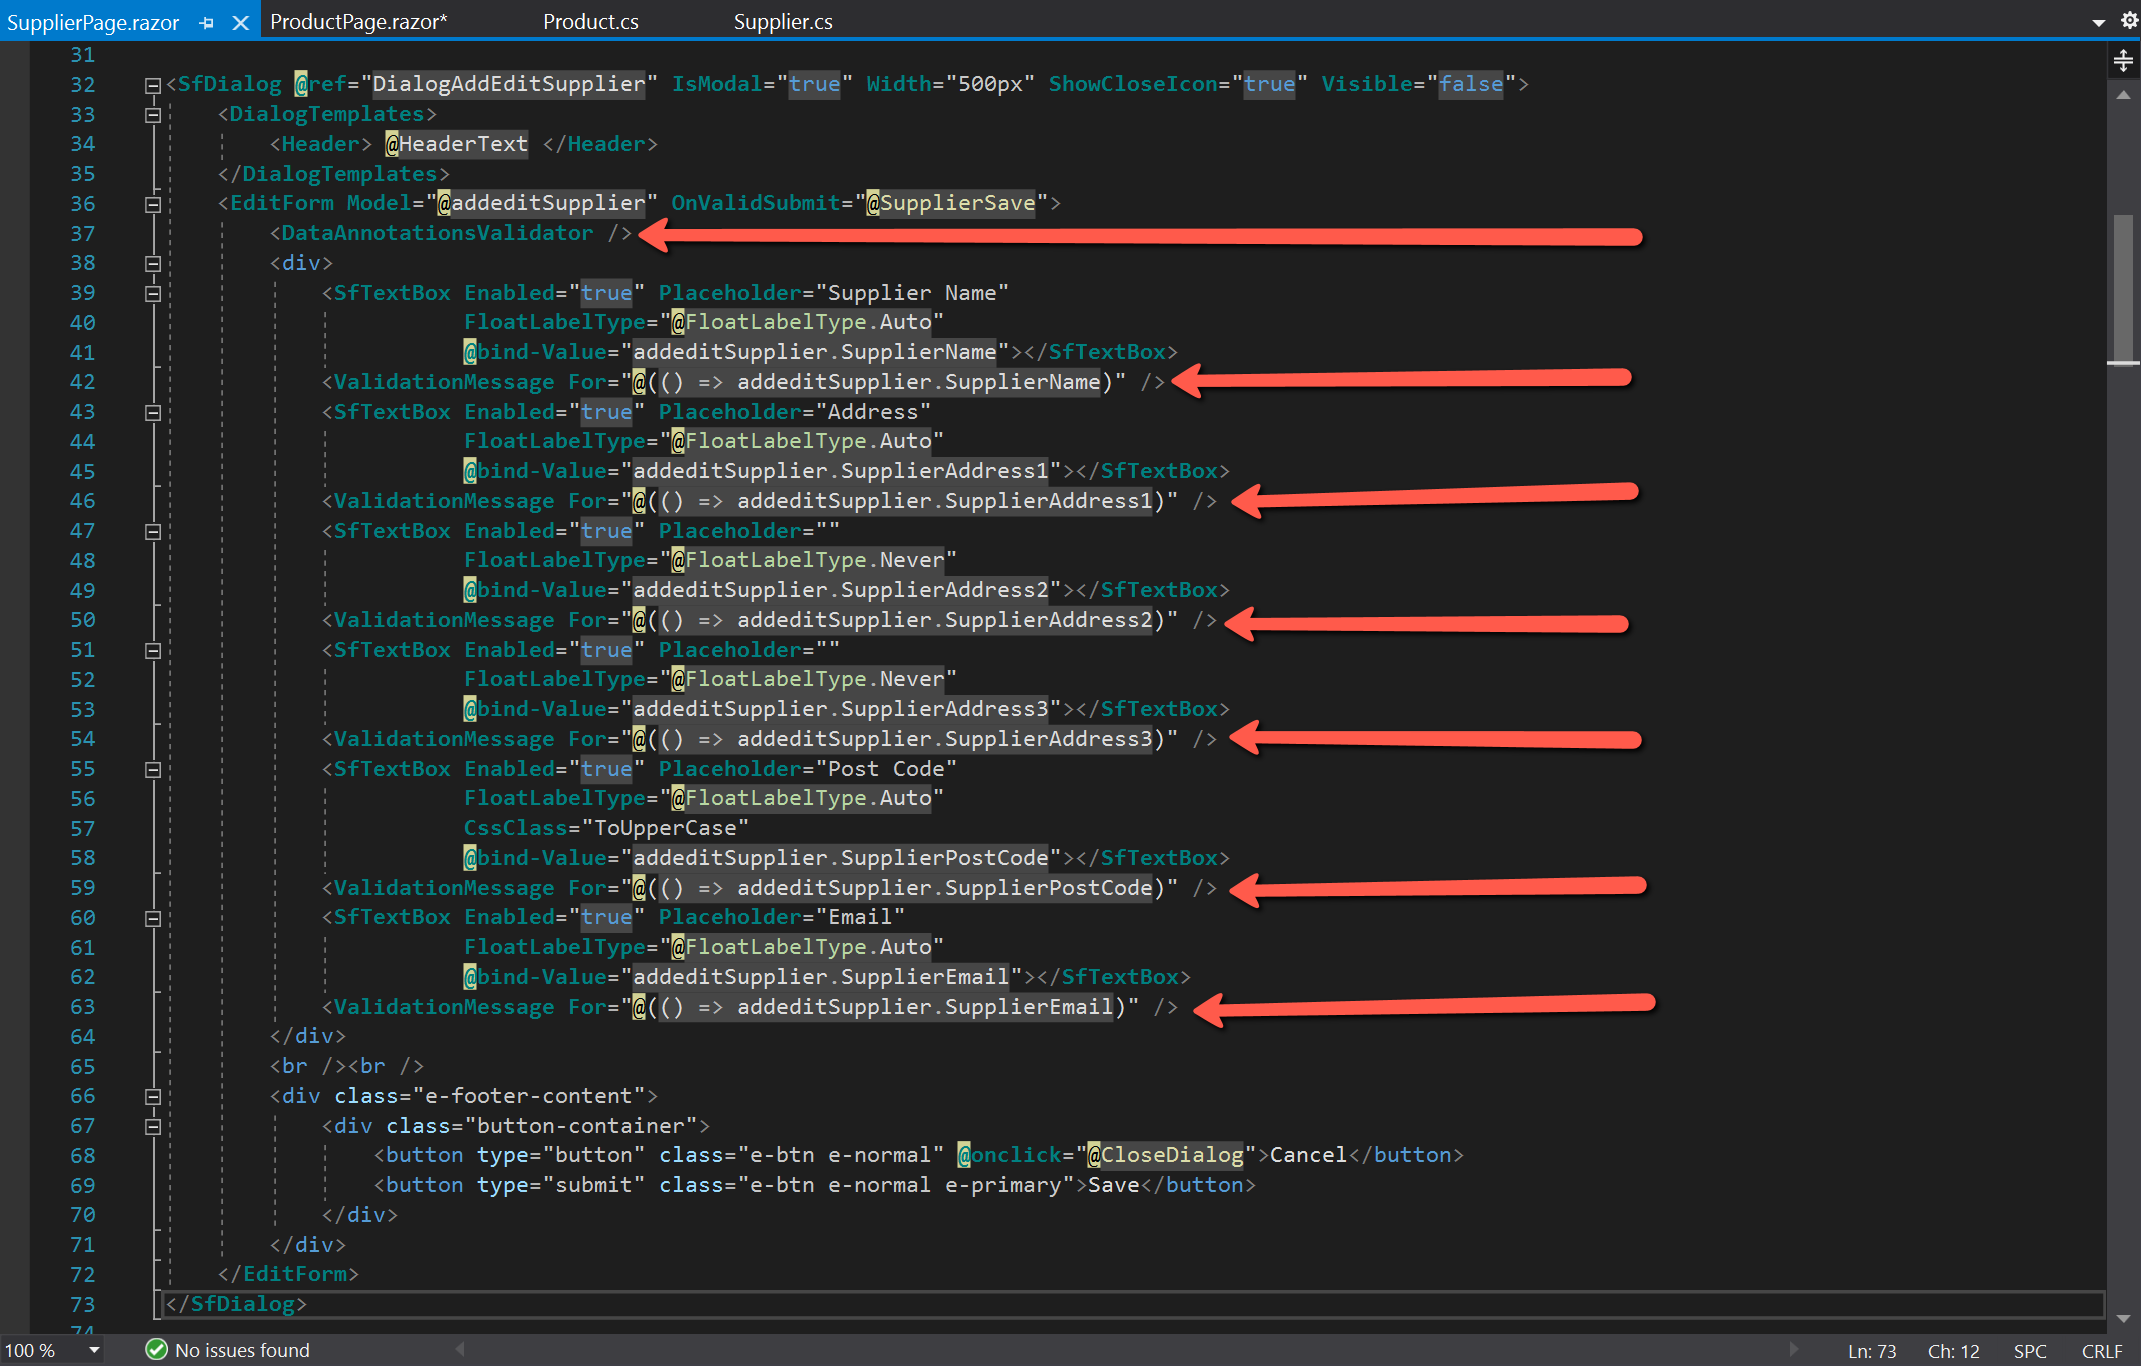
For data validation to take place it is essential that <DataAnnotationsValidator /> is placed within the <EditForm> tags. It doesn't appear to make any difference where it is placed, but directly after the opening <EditForm> tag would seem a logical place.
To display the error messages defined in the data model, the following is the form of placeholder that also needs to be placed within the <EditForm>
<ValidationMessage For="@(() => addeditProduct.ProductCode)" />Again, the logical place is directly below the item being validated, but an alternative would be to place all messages at the top of the form, or perhaps immediately above the 'Save' button. The following shows the revised code for the dialogs for Product and Supplier.

Project Code
The C# code for the changes made for data validation are shown here.
YouTube Video
Blazor Purchase Orders - Part 9: Data validation