Deploying to Azure
Summary
Having created the basic purchase order system it would be nice to deploy it so it can be tested in a real world environment. Microsoft Azure appeals to me in that it is probably simpler to deploy a Blazor application to Azure than the alternative of setting up a server with IIS etc. However, in the spirit of this project so far I want to keep costs to a minimum. I have therefore signed up to the Azure 'Free Trial', which, in theory, should not incur any costs for what I want to achieve - but be careful, I don't guarantee that it will be entirely cost-free.
YouTube Video
Create Azure 'Free Trial'
To create an Azure account the first prerequisite is that you have a Microsoft or GitHub account. I have an Outlook.com account and used that. To create an Azure account go to https://azure.microsoft.com/en-gb/free/ and follow the links to 'Start for Free' or 'Free Account'. You will see that you will get 12 months of certain free services, $200 (£150) credit for use in the first 30 days and access to some always free services. At the time of writing, one of the 12 months free services is 250GB of SQL database; we will be making use of this offering.
As part of the sign up procedure, as well as a Microsoft account, you will be asked to provide a telephone number for verification (I had a text message with a verification code) and a valid debit or credit card. To keep the Azure account 'live' after the first 30 days you will have to 'upgrade' to a 'pay-as-you-go' account; you will therefore need to be very wary about using services that could be costly. For example, as mentioned, one of the free for 12 months services is "250 GB of Azure SQL Database standard S0 instance with 10 database transaction units". Note that I think this specifically refers to ONE database, not a server with a number of databases whose size is less than 250GB.
One SQL Database
That limitation of one SQL database is going to cause us a problem. When we originally created the project we added two databases, one for authentication and authorisation (PurchaseOrdersAuth) and another for the purchase orders (PurchaseOrders). On the basis that the Azure subscription only permits one SQL database we need to combine these two databases into a single database. Fortunately this is pretty simple. There are a number of ways of achieving this, but I believe the following is probably the easiest.
We will be 'merging' the PurchaseOrdersAuth database into PurchaseOrders. My logic for doing it this way round is that the PurchaseOrdersAuth database only has data tables; there are no views or stored procedures and it's a lot simpler to move data tables than views or stored procedures.
- Open SQL Server Management Studio, expand the Databases folder, highlight and right-click on PurchaseOrdersAuth, select Tasks followed by Export Data.
- Click 'Next' on the 'Welcome Wizard' (if it's displayed) to open the 'Choose a Data Source' window
- Select 'SQL Server Native Client 11.0' from the 'Data Source' drop-down list
- Select the appropriate server from the 'Server Name' drop-down list
- I have used 'Windows Authentication' for accessing SQL server, so left this selected; change if necessary.
- Select 'PurchaseOrdersAuth' from the 'Database' drop down list
- Click 'Next' to open the 'Choose a Destination' window
- Select 'SQL Server Native Client 11.0' from the 'Data Source' drop-down list
- In theory, select your server from the drop-down list of servers. I found that this refused to populate, so went back to the previous window and copied and pasted the server name into the 'Server name' box. It seemed to work.
- I have used 'Windows Authentication' for accessing SQL server, so left this selected; change if necessary.
- Select 'PurchaseOrders' from the Database drop-down list.
- Click 'Next' to open the 'Specify Table Copy or Query
- Select 'Copy data from one or more tables or views' and click 'Next'.
- On the 'Select Source Tables and Views', select all the tables. (I doubt '__EFMigrationsHistory' is needed, but no harm in keeping it.) Click 'Next' to open the 'Run and Save Package' window.
- Leave 'Run immediately' checked and click 'Next' to show the summary window.
- Click 'Finish' to run the wizard. I had one warning about validation that indicated that this would by OK if I had run the wizard as an administrator or from the system's console. This can safely be ignored.
- Click 'Close'.
- Highlight 'PurchaseOrders' and select 'Refresh'. Open the Tables item and check a few tables, such as Roles, Users and UserRoles. (Some tables won't have data, so don't be too alarmed.)


That completes the work we need to do on the SQL data prior to migration to Azure.
Migrating to SQL Database in Azure
For someone new to Azure (like me), the Azure Portal is a little intimidating to say the least, full of inexplicable acronyms, and an almost infinite number of options, some of which are confusingly similar.

I hope what follows is the simplest way through the Azure maze to achieve deploying our application to Azure...
Create a Resource Group
The first thing we must do is create an Azure Resource Group. Login into the Azure Portal and you should find 'Resource groups' in the top toolbar section. If it isn't visible, either enter 'Resource' in the search box, or click the Portal menu icon in the top left-hand corner of the window.
On the Resource Groups page, either select the '+ Create' at the top of the form, or the blue 'Create resource group' in the centre of the form.
- Subscription should default to 'Free Trial' - unless you have already upgraded to a 'pay-as-you-go' account.
- Enter a suitable name for the Resource Group. Anything suitable will do; I have added the suffix 'RG' for 'Resource Group'
- Select a region from the drop-down list. I suggest a region depending on your location, but I don't think it matters that much for what we are doing.
- Click 'Review + create' and on the next form click 'Create'. (I think there are validation tests for duplicate Resource Group names, etc.)
- Once the Resource Group has been created click the 'Home' item at the top left.


Create a SQL Server
Don't get misled by the numerous options with 'SQL' in their name (such as Azure SQL); we need to create a SQL server at this point. To do this:
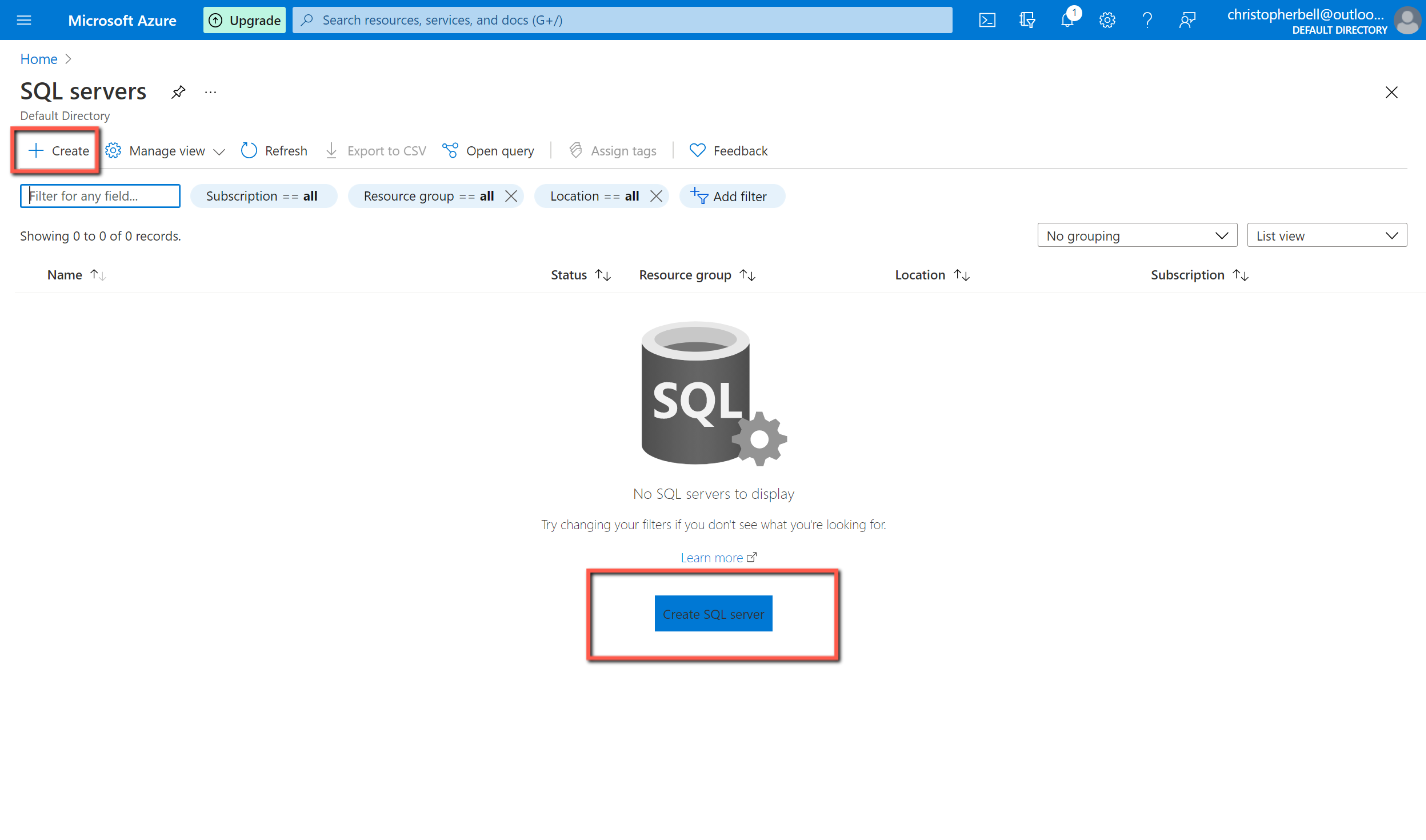
- I suggest entering 'SQL server' in the search box, and select the 'SQL servers' option.
- On the 'SQL servers' page, either select the '+ Create' at the top of the form, or the blue 'Create resource group' in the centre of the form.
- Select 'Free Trial' from the subscriptions drop-down list
- Select the 'Resource group' created in the previous step
- Enter a suitable name for the server. This must be lower case.
- Select a 'Location'. The same as the Resource group would make sense.
- Enter a name for the server administrator.
- Enter and confirm the server admin password. This will need to be entered in our application later. By chance I entered "%\" (without the quotes) as part of my password; this caused problems as it 'escaped' the following characters - probably best to avoid "\" altogether and special characters next to each other.
- Click 'Review + create' and having reviewed the information on the next page, click 'Create'.
- The next form shows 'Deployment in progress'. This will take about 5 minutes and will eventually show 'Your deployment is complete'.
- When the deployment is complete message appears, click the 'Go to resource' button.
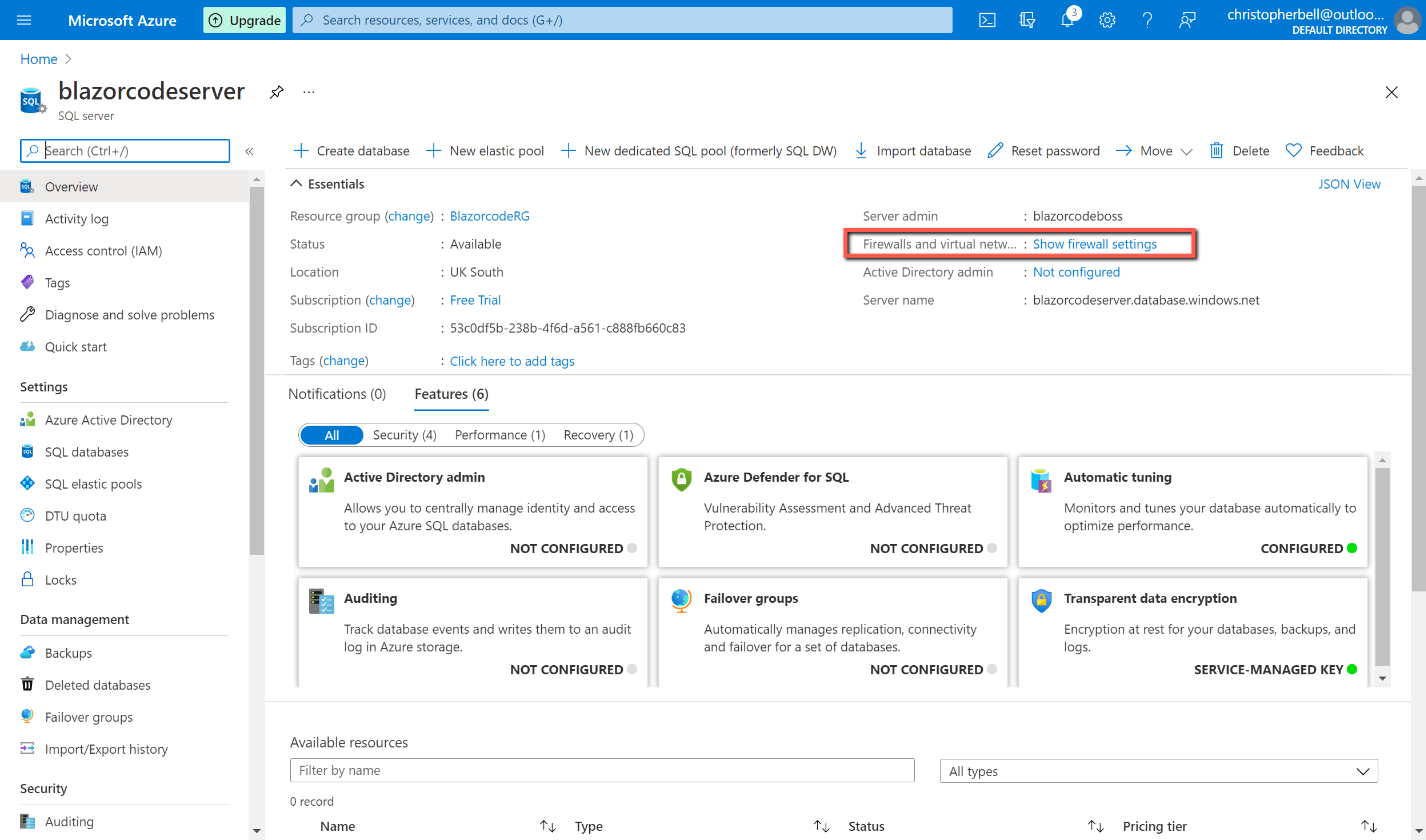
- On the SQL server overview page, click 'Show firewall settings' item in the top right quadrant of the form.
- Click '+ Add client IP' to add your IP address to the permitted IP addresses allowed access to the database. (This will allow you to gain access to the server from SQL Management Studio from your PC.)
- On the same form, click 'Yes' on the 'Allow Azure services and resources to access this server'. (This will later allow the published app to gain access to the server.)
- Click 'Save' at the top of the form.


Migrate the database to Azure
Having created the Resource group and SQL server in Azure, this part is remarkably simple; it couldn't be easier.
- Open SQL Management Studio on your development machine, and in 'Object Explorer' right-click on the database and select Tasks > Deploy Database to Microsoft Azure SQL Database
- On the wizard Introduction form, click 'Next'
- On the Deployment Settings form, click Connect...
- A 'Connect to Server' dialog will appear
- Manually type in the server name created in Azure, followed by '.database.windows.net'
- Select 'SQL Server Authentication' from the drop-down list
- Enter the server login and password used when creating the server
- Remember password - I'll leave that to you...
- Click 'Connect'
- In 'New database name' I suggest you use the same name as we used locally.
- In Microsoft Azure SQL Database settings, select the following ***IMPORTANT - USE THESE SETTINGS FOR THE "FREE FOR 12 MONTHS" DATABASE ***
- Edition as 'Standard'
- Maximum database size as '250'
- Service Objection as S0
- Leave the Temporary file name as the default.
- Click 'Next'
- Click 'Finish'
- A form will be displayed showing the progress of the migration. This took a few minutes to complete in my case.
- Click 'Close' when the 'Operation Complete' form appears.


Make Changes to the Code
Before we publish the application there are a few changes we need to make to the C# code to take account of the location of the Azure SQL database, and to remove some redundancy.
Connection Strings
Open Visual Studio and select appsettings.json. In this file we currently have two 'ConnectionStrings', but since we have combined the two SQL databases into a single database we only need one. (We will be changing the Connection String to point to the Azure SQL database shortly.) Delete the line with 'SqlDBcontext'.

The only place that refers to 'SqlDBcontext' is in 'Startup.cs'. Open Startup.cs and change 'SqlDBcontext' to 'DefaultConnection'.

We now need to replace the 'DefaultConnection' with the correct connection string so that the application looks at the Azure SQL database.
Return to the Azure portal, and under 'Recent Resources' you should see the SQL server we created earlier. Select it. When the page opens, scroll down and you should see the new database we created by migrating from our local database. Click on the name of the database to open the 'SQL database' page. Connection strings is shown in the top right-hand quadrant; click on 'Show database connection strings'. This will open a new page with the connection string we need. Copy it to the clipboard.
Return to Visual Studio and the appsettings.json file. Replace the contents of the 'DefaultConnection' with the connection string just copied from the Azure portal. Replace the part '{your_password}' with your password (including the curly brackets).


Save all files and run the application. It should run, but will now be connected to the Azure SQL database. This can be simply tested by adding a new Tax Code and verifying that there is no new Tax Code in the local SQL database.
As an aside, you can connect the Azure SQL database to SQL Server Management Studio installed locally. In Management Studio, in Object Explorer, click 'Connect' > 'Database Engine'. Enter the server name and credentials and click 'Connect'. The Azure SQL database can then be explored just as a local database can be.


Publishing the app
The groundwork has all now been completed (well, almost), so we can now publish the application.
- In Visual Studio save and close all files.
- In Solution Explorer right-click the BlazorPurchaseOrders project and select 'Publish'
- Select 'Azure' as the 'Target' and click 'Next'
- Select 'Azure App Service (Windows)' as the 'Specific Target' and click 'Next'
- On the App Service form
- Select the 'Subscription name' from the drop-down list ('Free Trial')
- View will have 'Resource group' - leave as is
- Leave 'Search' blank
- Click the + sign above 'App service instances'
- On the 'App Service (Windows) form
- The 'Name' will be pre-populated with a name plus date/time. This can be edited to something shorter, but I believe it must be unique across Azure, so you might need to adjust the name slightly. This is the name that will prefix ".azurewebsites.net/" to create the website name, e.g. https://blazorpurchaseorders.azurewebsites.net/
- Make sure 'Subscription name' is populated with 'Free Trial' (or select an appropriate subscription).
- Select 'Resource group' (there should be only the one we created earlier)
- On 'Hosting Plan' make sure you select 'New' and select a 'Free' plan with a suitable location. Edit the 'Hosting Plan' name if you want.
- Click 'Create' and you will be returned to the 'App Service' form
- On the App Service form click 'Next'
- On 'Deployment Type' select the top option, 'Publish (generates pubxml file)
- Click 'Finish'
- You will be returned to the 'Publish' form.
- Do not configure any of the 'Service Dependencies'. There will probably be one for a 'SQL Server Database' and one for 'Signal R'. We have already dealt with the SQL database, and Signal R can be ignored for the moment.


Click 'Publish' to start publication. When complete the webpage with the application running should be displayed - if it does, "well done!". The website address can also be copied from the 'Publish' form. You will need to log in to gain access.
The first time I tried to publish it did not go entirely to plan for me... I had omitted to change the 'Allow Azure services and resources to access the server' to 'Yes' on the server firewall page. As a result I got a whole webpage of error message suggesting that I revert to Developer mode to identify the problem - not helpful at all!
However, having got the Publish wizard to work with Azure, I must say I think it is fantastic.
Localisation
Once published and working, the next problem I ran into was that the date and currency formats were US style.

I had deliberately selected 'UK South' as the location of the Resource Group, SQL server, App Plan and App Service, so was a little surprised by this. Further investigation pointed to the application itself, rather than Azure. To fix the problem, I has to add the following two lines to Startup.cs.
The first line to the end of the 'public void ConfigureServices(IServiceCollection services)' method)
services.AddLocalization();and the second after 'app.useRouting();' in the 'public void Configure(IApplicationBuilder app, IWebHostEnvironment env)' method.
app.UseRequestLocalization("en-GB");Preview Order link
The next problem that needed tackling was the server name used in emails for the link to view purchase orders. This currently points to 'localhost'; this needs replacing with the Azure web address. Note that this will depend on your actual deployment, so will not be the same as shown here.
- In the Azure portal, go to the 'App service' page and copy the application URL.

- In Visual Studio, go to Index.page and edit the Email section of the ToolBarClickHandler so that the 'localhost;' address is replaced by the URL of the website. (I chose to comment out the 'localhost' line, so I had it for swapping back for testing if needed.)

Identity Manager
We have a choice as to whether to publish the Identity Manager application to Azure or to keep it local. For this experimental application I cannot see any particular benefit in publishing it to Azure. To use it locally we only need to change the connection string in appsettings.json to that for the Azure SQL database.
Close the 'BlazorPurchaseOrders' project, open 'IdentityManager' and edit appsettings.json, replacing the 'DefaultConnection' with the appropriate connection string from the Azure SQL database.

Development mode
When maintaining an application it can be useful to link to the local database rather than the live version. This is easily achieved.
In Solution Explorer in Visual Studio you will notice a file called appsettings.Development.json (under the appsettings.json node). Any entries made in here are read preferentially whilst running the application in local IIS Express. To use the local SQL database simply enter a 'ConnectionStrings' section with the connection string to the local SQL database.

appsettings.Development.json can also be used for other variables that you want to use locally, but not once deployed. For example, I have saved different SMTP settings in appsettings.Development.json where I have wanted to experiment with different email addresses.
The technique for saving different variables in appsettings.Development.json would be ideal for saving and using 'localhost' versus 'live web address' for the 'preview order link' used in the preview order emails. I haven't implemented this (so far), but it would be an interesting exercise...
References
- I can highly recommend watching the series of YouTube videos called "Azure tutorial for beginners" by Kudvenkat. His website is https://www.pragimtech.com
- Microsoft Docs had the answer to the localisation settings