Blazor Server Web App
Creating a new Blazor Web App
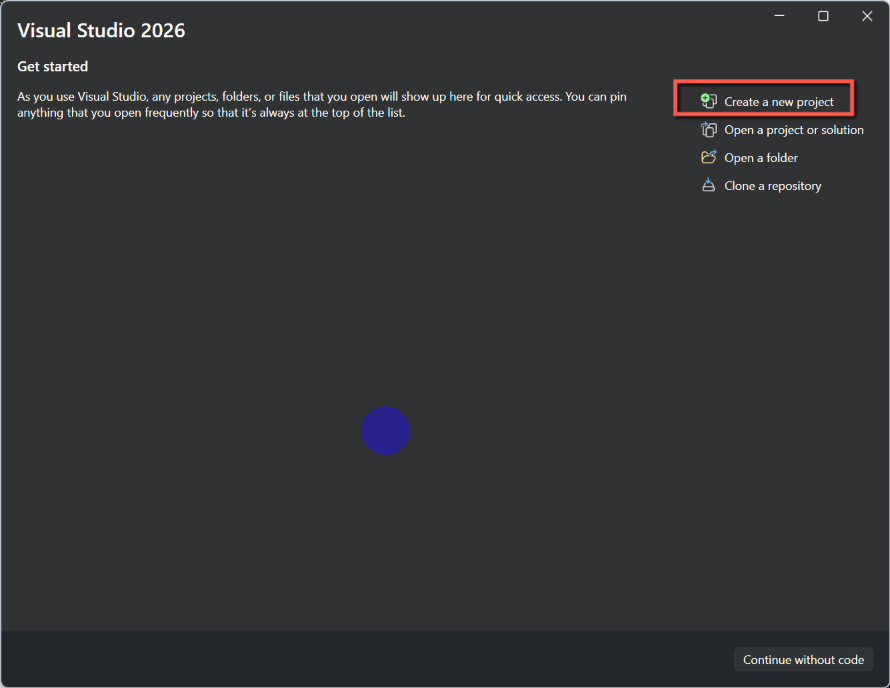
Open Visual Studio (I'm using Visual Studio 2026 - Community Edition)
- Select Create a new project
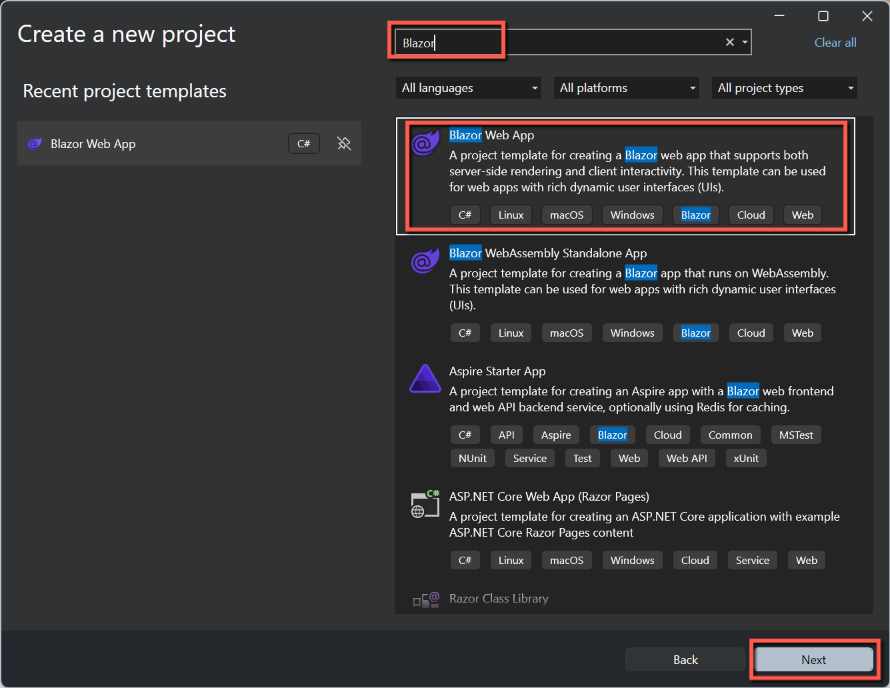
- Enter Blazor in the template search box (if necessary)
- Select Blazor Web App
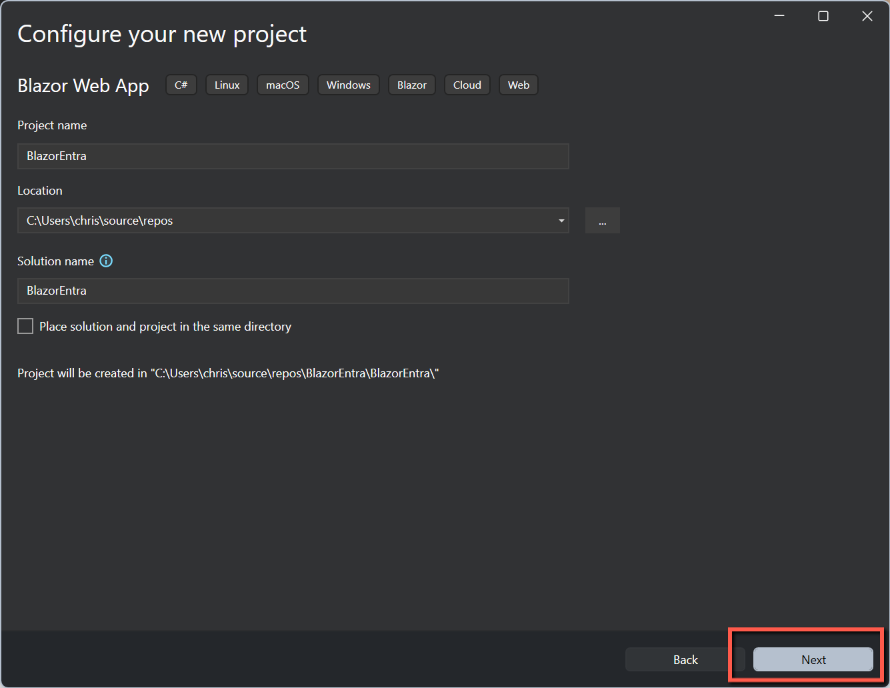
- On the Configure your new project form enter
- A suitable Project name
- Leave the Location as the default
- Leave the Solution name the same as the Project name
- Click Next
- On the Additional information form
- Select .NET 10.0
- Leave Authentication as None
- Select Server for Interactive render mode
- Select Per page/component for Interactivity location
- Leave Include sample pages as checked
- Click Create

Adding Microsoft Identity to a Blazor Server App
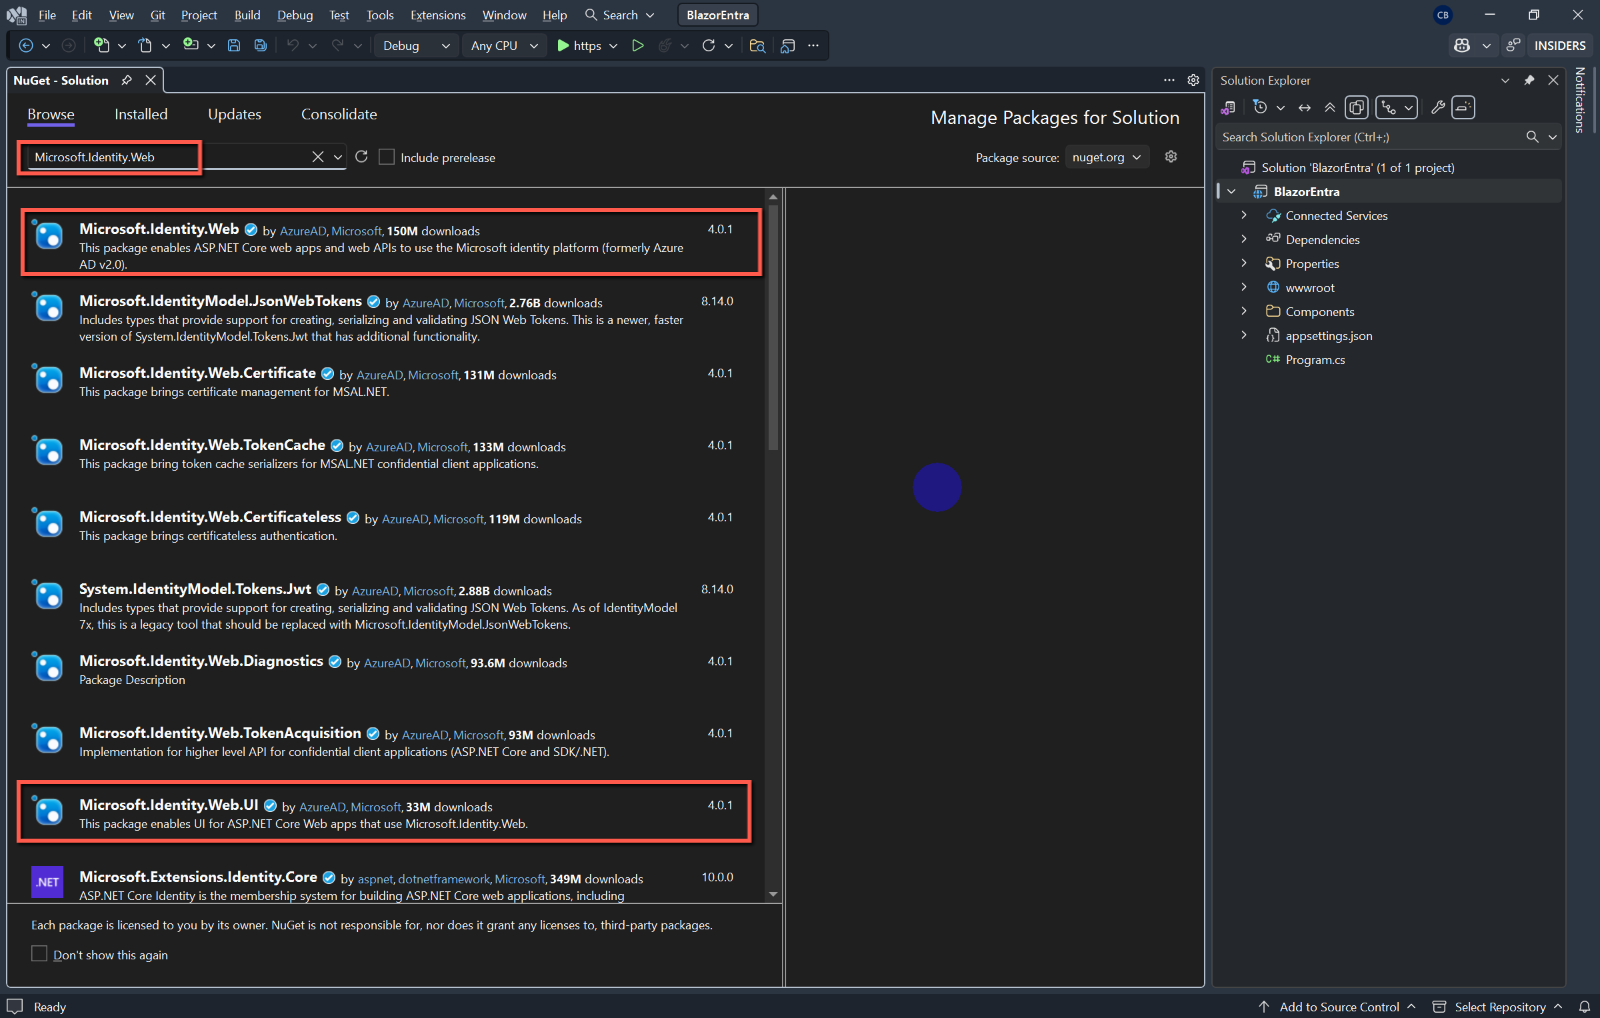
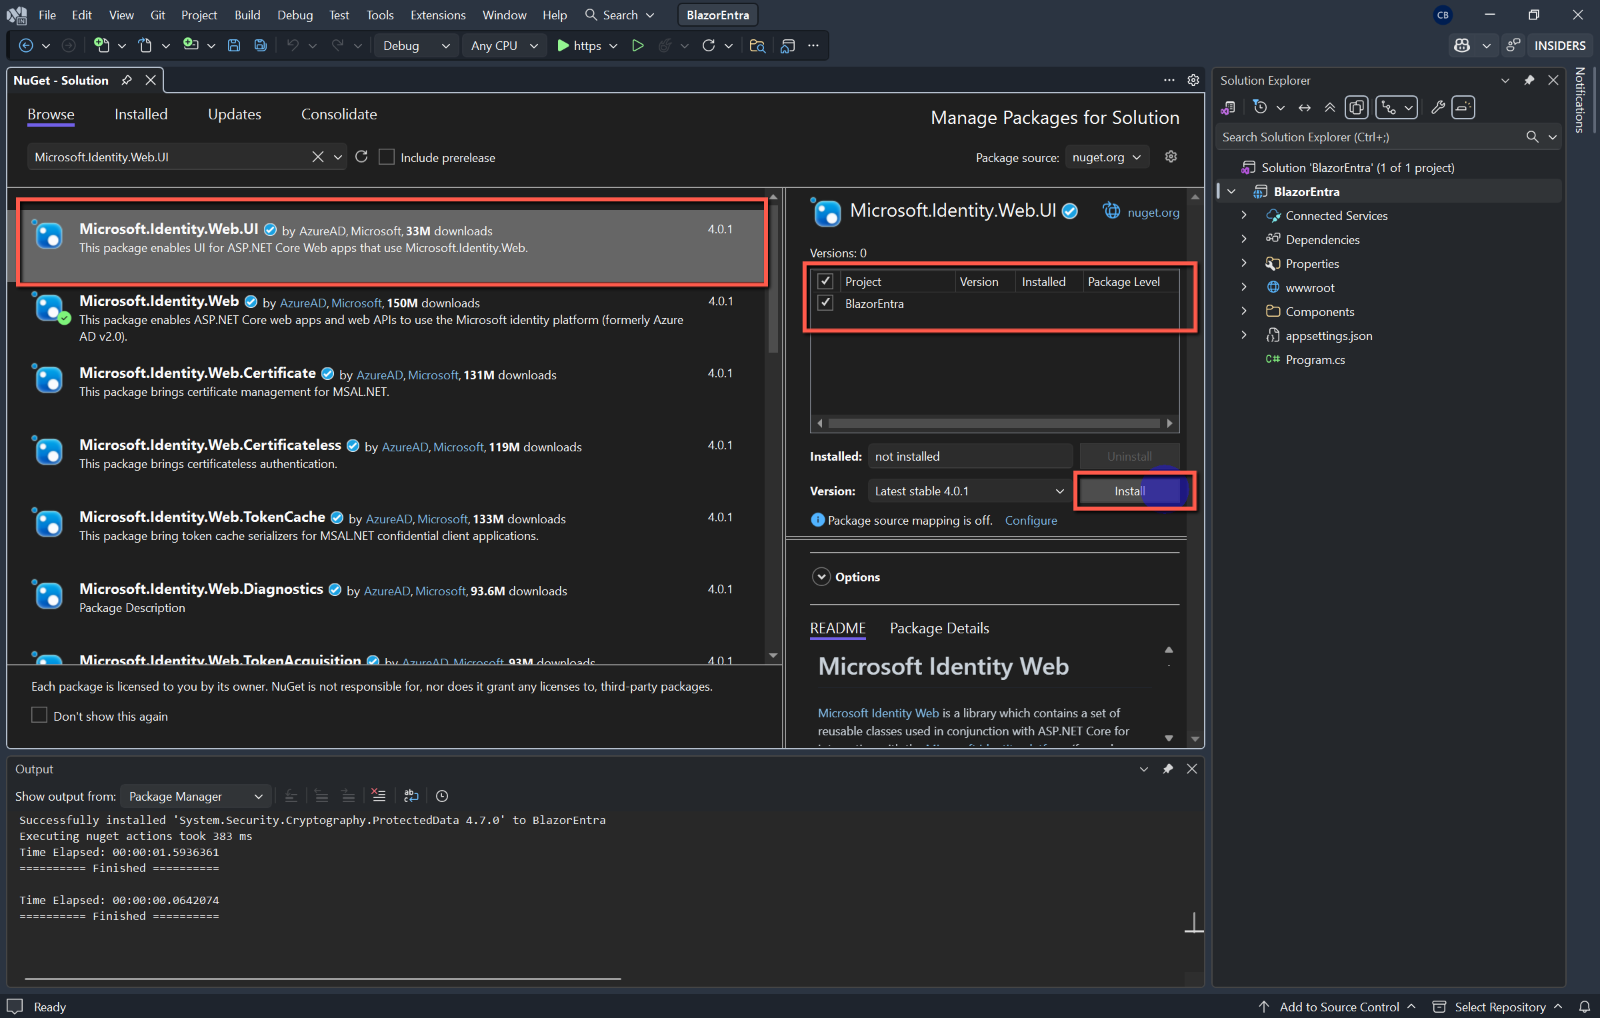
Add NuGet packages
- Microsoft.Identity.Web
- Microsoft.Identity.Web.UI
These can be added either by using the CLI (Command Line Interface - e.g. NuGet Package Manager Console, Bash or Powershell making sure you are in the solution folder.) These are the commands:
dotnet add package Microsoft.Identity.Web
dotnet add package Microsoft.Identity.Web.UI
In the above example I used the NuGet Package Manager Console, but note that I had to change directory to ..\repos\BlazorEntra\BlazorEntra
Alternatively, use the NuGet Package Manager within Visual Studio.


Configure appsettings.json
I will not be uploading this code to GitHub, so for simplicity will be making changes directly in appsettings.json. Insert the following placeholder code in sppsettings.json.
  "AzureAd": {
    "Instance": "https://{your-tenant}.ciamlogin.com/",
    "Domain": "{your-tenant}.onmicrosoft.com",
    "TenantId": "{GUID-of-external-tenant}",
    "ClientId": "{APP-REGISTRATION-CLIENT-ID}",
    "ClientSecret": "{APP-REGISTRATION-CLIENT-SECRET-VALUE}",
    "CallbackPath": "/signin-oidc"
  }
We now need to replace the placeholders with data from Entra ID.
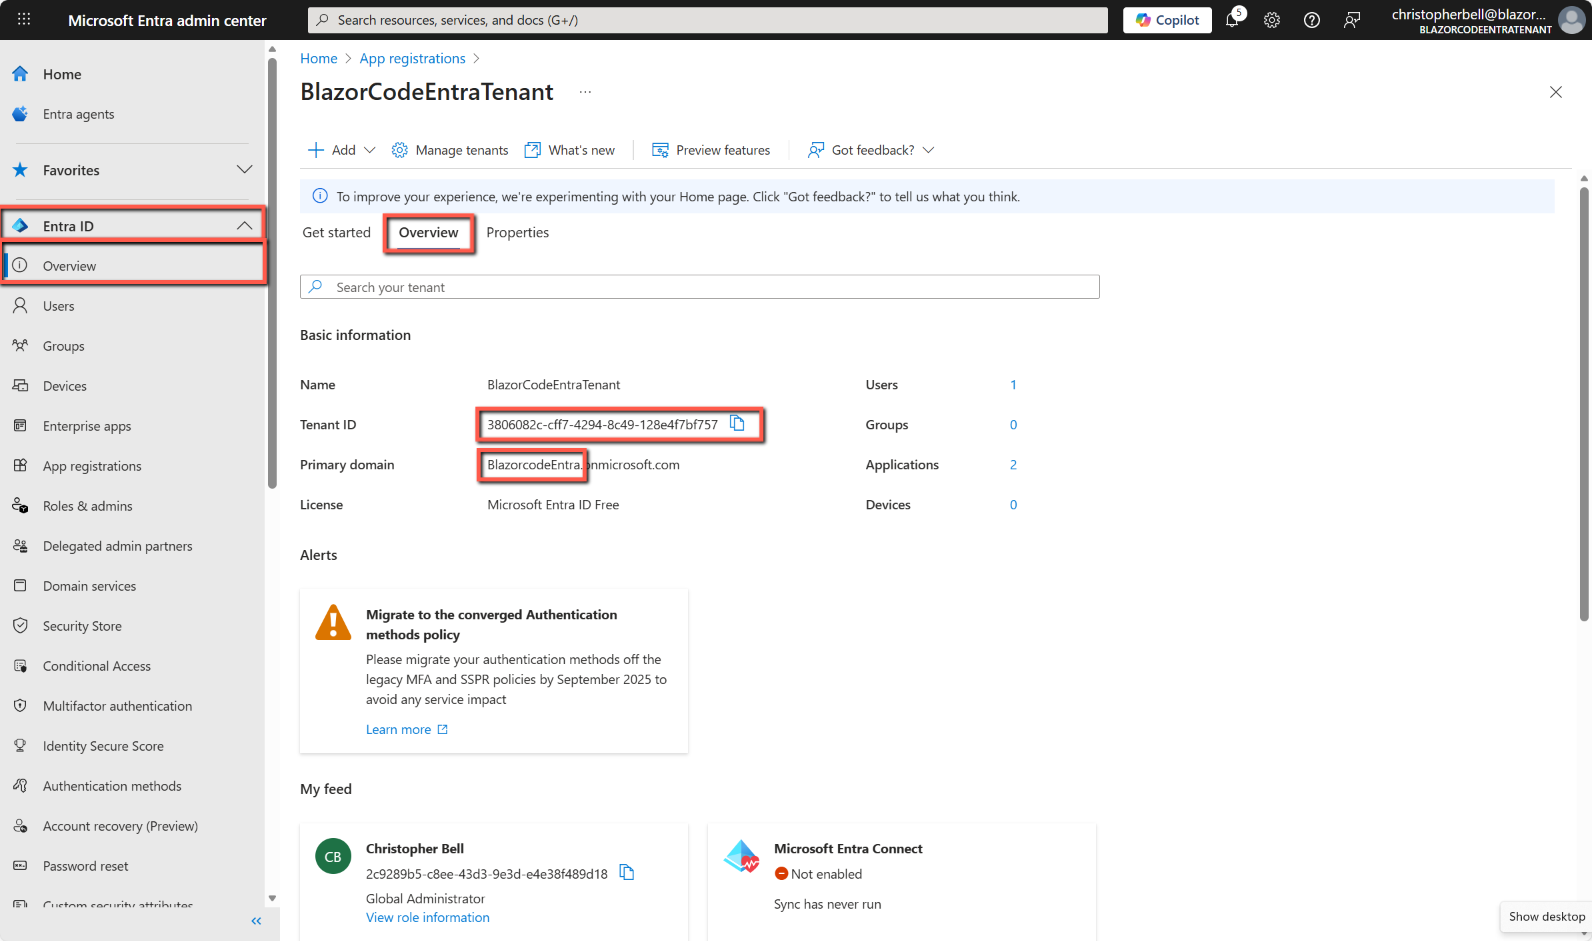
Replace {your-tenant} with the name of your Entra ID tenant. To find the {tenant-name} open the Azure portal switch to the Entra ID tenant.
- Select Entra ID > Overview from the left-hand menu and then Overview
- {your-tenant} is the part of the Primary domain before .onmicrosoft.com. (Not the Name of the tenant)
- {GUID-of-external-tenant} is Tenant ID
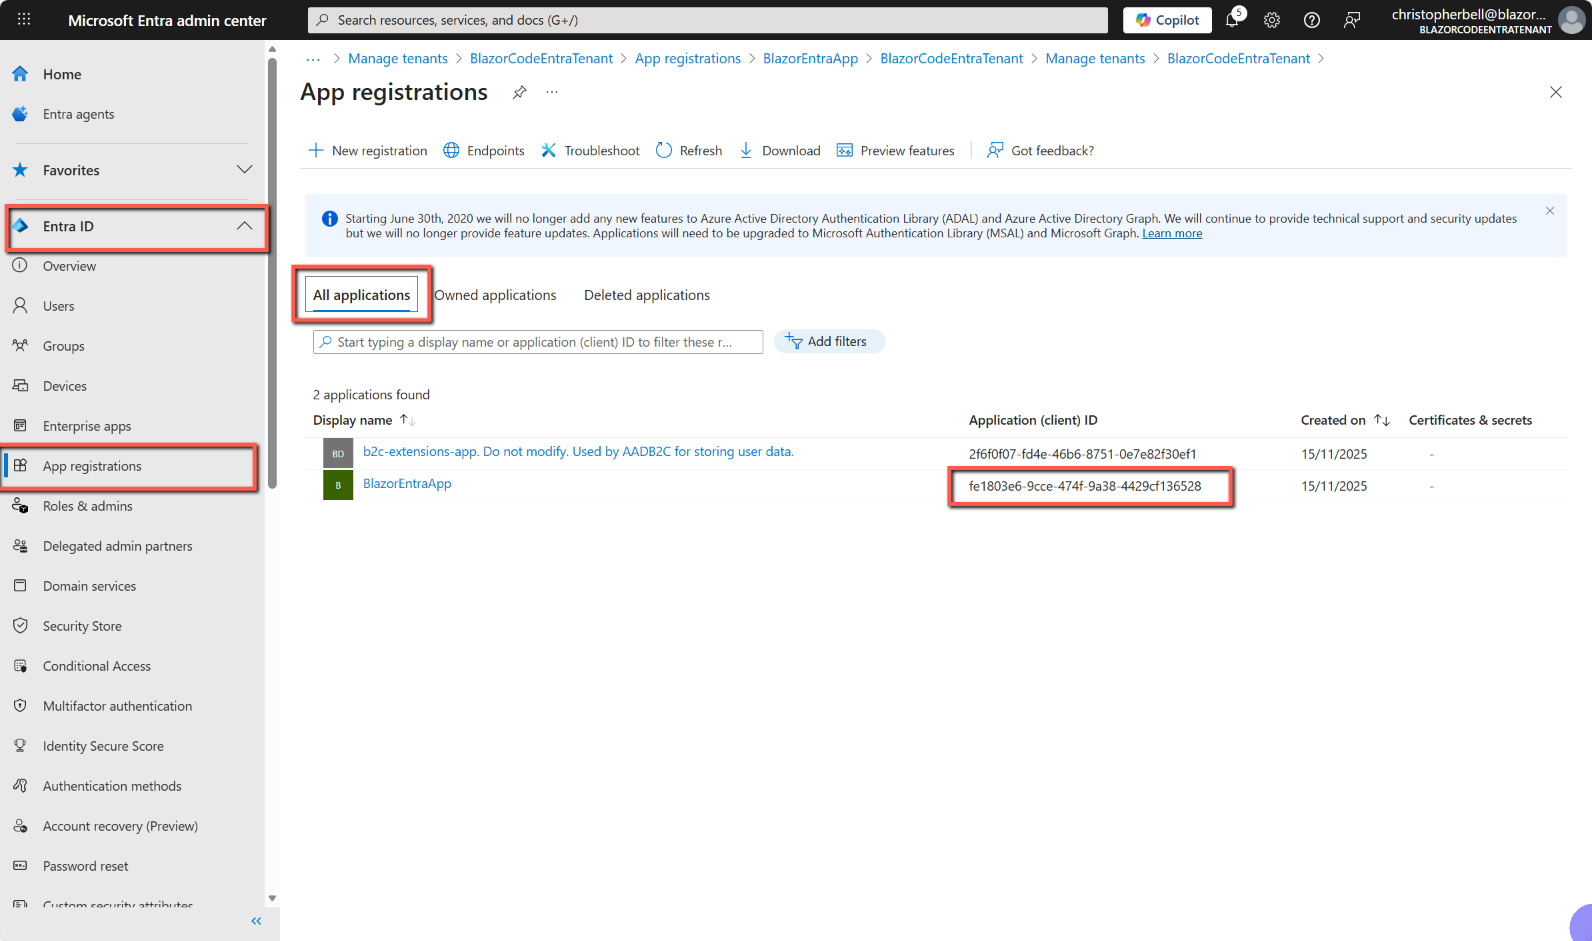
- To find the {APP-REGISTRATION_CLIENT_ID} select Entra ID > App registrations > All applications. The Application (client) ID is displayed in the column with the same name.
- To find the {APP-REGISTRATION-CLIENT-SECRET-VALUE} select Entra ID > App registrations > All applications > Certificates and secrets and copy the Value of the relevant secret (I imagine any secret would do if you created more than one).
Amend Program.cs to use Authentication
Program.cs
- In Program.cs add the following using statements at the top of the file:
using Microsoft.AspNetCore.Authentication.OpenIdConnect;
using Microsoft.Identity.Web;- In the builder section insert the following:
  builder.Services
  .AddAuthentication(OpenIdConnectDefaults.AuthenticationScheme)
  .AddMicrosoftIdentityWebApp(builder.Configuration.GetSection("AzureAd"))
    .EnableTokenAcquisitionToCallDownstreamApi() // optional if you'll call APIs
    .AddInMemoryTokenCaches();
- And lower in the file insert:
app.UseAuthentication();
app.UseAuthorization();
Counter.cs
We'll use the Counter page to illustrate the amendments needed to require a user to log in to access the page.
- Open Counter.cs and add the following to the top of the file:
@using Microsoft.AspNetCore.Authorization
@attribute [Authorize]
That's it! That's all that's needed to add authentication to the Counter page.
Save & Test
Save all files and run the application. The application should run and display the 'standard' Blazor application. However, as we have added authorisation to the Counter page, clicking on the
Code
The full code for the files changed is:
appsettings.json
{
  "Logging": {
    "LogLevel": {
      "Default": "Information",
      "Microsoft.AspNetCore": "Warning"
    }
  },
  "AllowedHosts": "*",

  "AzureAd": {
    "Instance": "https://{your-tenant}.ciamlogin.com/",
    "Domain": "{your-tenant}.onmicrosoft.com",
    "TenantId": "{GUID-of-external-tenant}",
    "ClientId": "{APP-REGISTRATION-CLIENT-ID}",
    "ClientSecret": "{APP-REGISTRATION-CLIENT-SECRET-VALUE}",
    "CallbackPath": "/signin-oidc"
  }
}
Program.cs
using BlazorEntra.Components;
using Microsoft.AspNetCore.Authentication.OpenIdConnect;
using Microsoft.Identity.Web;

var builder = WebApplication.CreateBuilder(args);

// Add services to the container.
builder.Services.AddRazorComponents()
    .AddInteractiveServerComponents();

builder.Services
  .AddAuthentication(OpenIdConnectDefaults.AuthenticationScheme)
  .AddMicrosoftIdentityWebApp(builder.Configuration.GetSection("AzureAd"))
    .EnableTokenAcquisitionToCallDownstreamApi() // optional if you'll call APIs
    .AddInMemoryTokenCaches();

var app = builder.Build();

// Configure the HTTP request pipeline.
if (!app.Environment.IsDevelopment())
{
    app.UseExceptionHandler("/Error", createScopeForErrors: true);
    // The default HSTS value is 30 days. You may want to change this for production scenarios, see https://aka.ms/aspnetcore-hsts.
    app.UseHsts();
}
app.UseStatusCodePagesWithReExecute("/not-found", createScopeForStatusCodePages: true);
app.UseHttpsRedirection();
app.UseStaticFiles();

app.UseAuthentication();
app.UseAuthorization();

app.UseAntiforgery();

app.MapStaticAssets();
app.MapRazorComponents<App>()
    .AddInteractiveServerRenderMode();

app.Run();
Counter.razor
@page "/counter"
@using Microsoft.AspNetCore.Authorization
@rendermode InteractiveServer
@attribute [Authorize]

<PageTitle>Counter</PageTitle>

<h1>Counter</h1>

<p role="status">Current count: @currentCount</p>

<button class="btn btn-primary" @onclick="IncrementCount">Click me</button>

@code {
    private int currentCount = 0;

    private void IncrementCount()
    {
        currentCount++;
    }
}