Index Page - Walls Grid
Introduction
In this post we are going to add a grid to display walls for a room selected from the rooms grid. We will be able to use much of the code used for rooms as a template for walls, albeit with some modifications.
This relationship between the Rooms and Walls grid is what I am calling Cascading grids - the results shown in the child grid (Walls) dependent on selections in the parent grid (Room). We also have the Projects dropdown list to consider as well; in this respect we can treat the Projects dropdown list as another grid. In particular we will need to deal with:
- Changing the selected project will need to refresh the Rooms grid, but as no Room would be selected at this stage the Walls grid must be initialised.
- When a room is selected the walls grid needs to be refreshed with the walls linked to the selected room.
- An event, such as the user choosing to add a new room, that de-selects a room in the room grid, will need to re-initialise the Walls grid.
- Another example of the above is the user choosing to delete a room. In this case we have cascade delete operational at the database level, so deleting a room will delete all associated walls; again the walls grid will need re-initialising.
YouTube Video
Walls Service
Before we start making changes to the Index page, we might as well make the changes we know will be required to WallService. If we follow the pattern for Rooms we know that:
- We won't need WallsReadAll
- In its place we need WallReadByRoom
- The situation for preventing duplicates is that
- we want to prevent the same wall name being used more than once for the same room, but it can be used for different rooms
- when editing a wall we need to exclude the current wall being edited from the count of wall names for the selected room.
Replace WallReadAll() with this:
public async Task<IEnumerable<Wall>> WallsReadByRoom(int RoomID)
{
	IEnumerable<Wall> walls;
	var parameters = new DynamicParameters();
	parameters.Add("RoomID", RoomID, DbType.Int32);

	sqlCommand = "Select * from Wall ";
	sqlCommand += "WHERE RoomID  = @RoomID";

	using IDbConnection conn = new SQLiteConnection(_configuration.GetConnectionString(connectionId));
	{
		walls = await conn.QueryAsync<Wall>(sqlCommand, parameters);
	}
	return walls;
}
For the Count methods, replace with:
#region CountWalls
public async Task<int> CountWallsByNameAndRoom(string WallName, int RoomID)
{
	var parameters = new DynamicParameters();
	parameters.Add("@WallName", WallName, DbType.String);
	parameters.Add("@RoomID", RoomID, DbType.Int32);

	sqlCommand = "Select Count(*) from Wall ";
	sqlCommand += "where Upper(WallName) = Upper(@WallName) ";
	sqlCommand += "and RoomID = @RoomID";

	using IDbConnection conn = new SQLiteConnection(_configuration.GetConnectionString(connectionId));
	{
		var countWall = await conn.QueryFirstOrDefaultAsync<int>(sqlCommand, parameters);
		return countWall;
	}
}

public async Task<int> CountWallsByNameAndRoomAndId(string WallName, int WallID, int RoomID)
{
	var parameters = new DynamicParameters();
	parameters.Add("@WallName", WallName, DbType.String);
	parameters.Add("@WallID", WallID, DbType.Int32);
	parameters.Add("@RoomID", RoomID, DbType.Int32);
	sqlCommand = "Select Count(*) from Wall ";
	sqlCommand += "where Upper(WallName) = Upper(@WallName) ";
	sqlCommand += "and RoomID = @RoomID ";
	sqlCommand += "and WallID <> @WallID";

	using IDbConnection conn = new SQLiteConnection(_configuration.GetConnectionString(connectionId));
	{
		var countWall = await conn.QueryFirstOrDefaultAsync<int>(sqlCommand, parameters);
		return countWall;
	}
}
#endregion


At this point I noticed that in the code for WallCreate and WallUpdate in the previous post had mis-spelt WallTypeName (I had missed out an 'l'). The correct code is:
 public async Task<bool> WallCreate(Wall wall)
{
    var parameters = new DynamicParameters();

    parameters.Add("@RoomID", wall.RoomID, DbType.Int32);
    parameters.Add("@WallName", wall.WallName, DbType.String);
    parameters.Add("@WallTypeID", wall.WallTypeID, DbType.Int32);
    parameters.Add("@WallTypeName", wall.WallTypeName, DbType.String);
    parameters.Add("@WallLengthMax", wall.WallLengthMax, DbType.Int32);
    parameters.Add("@WallLengthMin", wall.WallLengthMin, DbType.Int32);
    parameters.Add("@WallHeightMax", wall.WallHeightMax, DbType.Int32);
    parameters.Add("@WallHeightMin", wall.WallHeightMin, DbType.Int32);
    parameters.Add("@WallSqM", wall.WallSqM, DbType.Decimal);

    sqlCommand = "Insert into Wall (RoomID, WallName, WallTypeID, WallTypeName, " +
        "WallLengthMax, WallLengthMin, WallHeightMax, WallHeightMin, WallSqM) ";
    sqlCommand += "values(@RoomID, @WallName, @WallTypeID, @WallTypeName, " +
        "@WallLengthMax, @WallLengthMin, @WallHeightMax, @WallHeightMin, @WallSqM) ";

    using IDbConnection conn = new SQLiteConnection(_configuration.GetConnectionString(connectionId));
    {
        await conn.ExecuteAsync(sqlCommand, parameters);
    }
    return true;
}
public async Task<bool> WallUpdate(Wall wall)
{
var parameters = new DynamicParameters();
parameters.Add("@WallID", wall.WallID, DbType.Int32);
parameters.Add("@WallName", wall.WallName, DbType.String);
parameters.Add("@WallTypeID", wall.WallTypeID, DbType.Int32);
parameters.Add("@WallTypeName", wall.WallTypeName, DbType.String);
parameters.Add("@WallLengthMax", wall.WallLengthMax, DbType.Int32);
parameters.Add("@WallLengthMin", wall.WallLengthMin, DbType.Int32);
parameters.Add("@WallHeightMax", wall.WallHeightMax, DbType.Int32);
parameters.Add("@WallHeightMin", wall.WallHeightMin, DbType.Int32);
parameters.Add("@WallSqM", wall.WallSqM, DbType.Decimal);
sqlCommand = "Update Wall ";
sqlCommand += "SET WallName = @WallName, " +
"WallTypeID = @WallTypeID, " +
"WallTypeName = @WallTypeName, " +
"WallLengthMax = @WallLengthMax, " +
"WallLengthMin = @WallLengthMin, " +
"WallHeightMax = @WallHeightMax, " +
"WallHeightMin = @WallHeightMin, " +
"WallSqM = @WallSqM ";
sqlCommand += "WHERE WallID = @WallID";
using IDbConnection conn = new SQLiteConnection(_configuration.GetConnectionString(connectionId));
{
await conn.ExecuteAsync(sqlCommand, parameters);
}
return true;
}
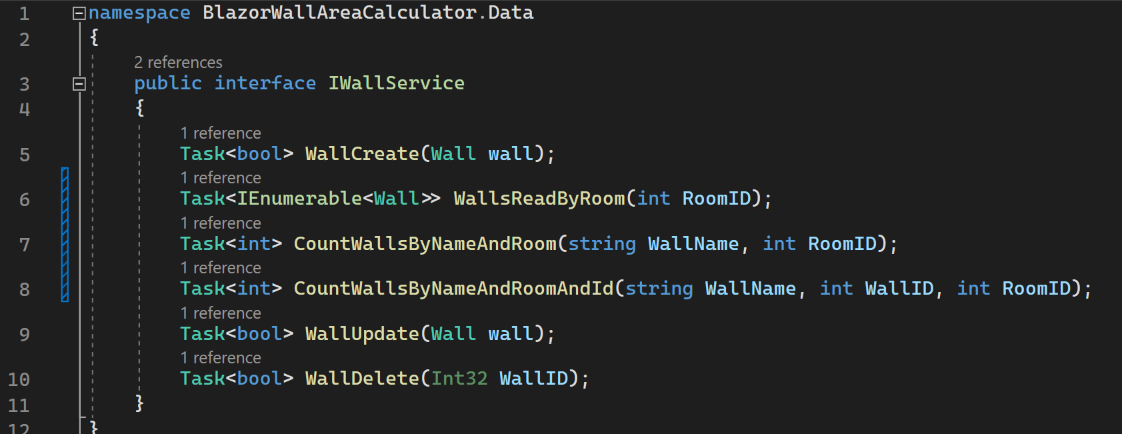
Now, modify IWallService to take account of the above changes to WallsReadByName and the 'Counts'.
namespace BlazorWallAreaCalculator.Data
{
    public interface IWallService
    {
        Task<bool> WallCreate(Wall wall);
        Task<IEnumerable<Wall>> WallsReadByRoom(int RoomID);
        Task<int> CountWallsByNameAndRoom(string WallName, int RoomID);
        Task<int> CountWallsByNameAndRoomAndId(string WallName, int WallID, int RoomID);
        Task<bool> WallUpdate(Wall wall);
        Task<bool> WallDelete(Int32 WallID);
    }
}
Index Page - Walls Grid
We want a grid for walls immediately below the Rooms grid. The easiest way to add the grid is to copy and paste the CSHTML for Rooms, including the header tag, and then replacing 'Room' with 'Wall'. A room is likely to have at least 4 walls, so I have increased the height to 210. (We might adjust this later if necessary.)
Before we go any further we want to add an additional column for the area of a wall. Insert the following after the column for Wall Name:
<GridColumn Field="@nameof(Wall.WallSqM)"
            HeaderText="Area"
            TextAlign="@TextAlign.Right"
            Width="50">
</GridColumn>
We should now add the declarations needed for the above:

We are using a new toolbar, so we need to populate WallToolbaritems when the page is opened. Add the following to the 'OnInitializedAsync' method.
WallToolbaritems.Add(new ItemModel() { Text = "Add", TooltipText = "Add a new wall", PrefixIcon = "e-add" });
WallToolbaritems.Add(new ItemModel() { Text = "Edit", TooltipText = "Edit selected wall", PrefixIcon = "e-edit" });
WallToolbaritems.Add(new ItemModel() { Text = "Delete", TooltipText = "Delete selected wall", PrefixIcon = "e-delete" });
We will now add some placeholder code for the WallToolbarClickHandler and WallRowSelectHandler, as shown below:
#region Walls
public async Task WallToolbarClickHandler(ClickEventArgs args)
{
    if (args.Item.Text == "Add")
    {
        //Code for adding goes here

    }
    if (args.Item.Text == "Edit")
    {
        //Code for editing

    }
    if (args.Item.Text == "Delete")
    {
        //Code for deleting

    }
}

public async Task WallRowSelectHandler(RowSelectEventArgs<Wall> args)  //Note <Wall>
{
    //{args.Data} returns the current selected records.

}

#endregion
Note that I have designated this as a #region; this is so I can collapse this section and will add #region to Rooms as well. As the code will be similar it will allow me to collapse sections to keep focused on the section I am working on.
Save all files and run the application.
Walls Dialog
Add
To add and edit wall records we will use the same technique we used for Rooms, i.e. we will add a Syncfusion Dialog. The Dialog will be called from the Wall Grid toolbar handler and will be populated by a wallAddEdit object. The Dialog, in turn will call methods for saving a wall record and cancelling.
At this stage we will concentrate on the inter-linking of grids, rather than a fancy dialog and calculating wall area. The dialog will simply have two input boxes, one for the wall name and the other for area (in SqM). Insert the following code into the CSHTML section below the RoomGrid.
<SfDialog @ref="DialogWall" IsModal="true" Width="420px" ShowCloseIcon="false" Visible="false" AllowDragging="true">
    <DialogTemplates>
        <Header> @dialogTitle</Header>
        <Content>
            <EditForm Model="@wallAddEdit" OnValidSubmit="@WallSave">
                <div>
                    <SfTextBox Enabled="true" Placeholder="Wall Name"
                               FloatLabelType="@FloatLabelType.Always"
                    @bind-Value="wallAddEdit.WallName">
                    </SfTextBox>

                    <div>
                        <br />
                    </div>

                    <SfNumericTextBox Enabled="true"
                                      Placeholder="Wall Area (SqM)"
                                      Format="n2"
                                      FloatLabelType="@FloatLabelType.Always"
                    @bind-Value="wallAddEdit.WallSqM"
                                      ShowSpinButton=false
                                      CssClass="e-style">
                    </SfNumericTextBox>
                </div>
                <br /><br />
                <div class="e-footer-content">
                    <div class="button-container">
                        <button type="submit" class="e-btn e-normal e-primary">Save</button>
                        <button type="button" class="e-btn e-normal" @onclick="@CancelWall">Cancel</button>
                    </div>
                </div>
            </EditForm>
        </Content>
    </DialogTemplates>
</SfDialog>
We need to declare a few variables, so enter the following at the top of the code section:
SfDialog? DialogWall;
Wall wallAddEdit = new Wall  ();
Notice that there is a CssClass property "e.style". This is to format the numeric textbox so that it is right-aligned. To add the style, insert this into the style block.
.e-numeric.e-style .e-control.e-numerictextbox {
    text-align: right;
    padding: 0px 5px 0px 0px;
}
As a side note, I had to put the line break code 'br /' in its own 'div'; I'm not quite sure why this was necessary, but as I wanted a gap between the text boxes it was what I had to do.
For the moment we will add two placeholder methods for WallSave and CancelWall. Add the following after WallRowSelectHandler and before #endregion:
protected async Task WallSave()
{
    if (wallAddEdit.WallID == 0)    //It's an insert
    {

    }
    else                            //It's an edit
    {

    }
}

void CancelWall()
{
    DialogWall.HideAsync();
}
That should have got rid of the errors in the SfDialog. We can now look at calling the Dialog from the Walls grid. The link between Room and Wall records is that the Wall model has a field for the RoomID. We must therefore ensure that a Room has been selected from the RoomGrid (and it's ID obtained) before we allow the Wall Dialog to open to add a new wall.
Insert the following at the top of the WallToolBarHandler. It's only really needed for the 'add' option, but I don't think there's any harm in having it at the top of the toolbar handler.
//Check that a room has been selected
if (SelectedRoomID == 0)
{
    await DialogService.AlertAsync("Please select a room.", "No Room Selected");
    return;
}
We now need to wire-up the 'Add' option on the WallToolbarHandler. We want the 'Add' button to open the WallDialog with a new wallAddEdit object and an appropriate title for the dialog. Insert the following into the 'Add' section of the WallToolbarHandler:
dialogTitle = "Add a Wall";
wallAddEdit = new();
await DialogWall.ShowAsync(false);
We now need to deal with the 'save' button. The first thing to do here is inject the WallService. Insert the following at the top of the code:
@inject IWallService WallServiceAdd the following to the Save, replacing the 'if' statement.
if (wallAddEdit.WallID == 0)    //It's an insert
{
    //Check for duplicates
    int duplicates = await WallService.CountWallsByNameAndRoom(wallAddEdit.WallName, SelectedRoomID);

    if (duplicates == 0)
    {
        wallAddEdit.RoomID = SelectedRoomID;

        // Temporarily assign values to these:
        wallAddEdit.WallTypeID = 0;
        wallAddEdit.WallTypeName = "";
        wallAddEdit.WallLengthMax = 0;
        wallAddEdit.WallLengthMin = 0;
        wallAddEdit.WallHeightMax = 0;
        wallAddEdit.WallHeightMin = 0;

        try
        {
            await WallService.WallCreate(wallAddEdit);
            //Refresh datagrid
            walls = await WallService.WallsReadByRoom(SelectedRoomID);
            StateHasChanged();
            await DialogWall.HideAsync();
        }
        catch
        {
            // Display warning message
            await DialogService.AlertAsync("An unexpected error has occured.", "Unknown Error");
            return;
        }
    }
    else
    {
        //Room already exists - warn the user
        await DialogService.AlertAsync("This wall already exists for this room; it cannot be added again.", "Warning!");
        return;
    }
}
In the above we check to ensure that a duplicate wall name is not being created for the selected room. We are then assigning the 'SelectedRoomID' to 'wallAddEdit.RoomID', and then assigning values to other fields that we will be ignoring for the moment. We then await the WallCreate and if successful we refresh the Wall grid to display the newly added record. (If unsuccessful, we use the Syncfusion Dialog Service to display an error.)
Run the application to check that the Wall Add button and Dialog Save and Cancel work. Also check that duplicates cannot be added and that a Room must be selected before the Dialog opens.
We can add walls, but selecting a different room and then swapping back to the original room fails to display the walls we have just added. To display the walls we need to add this to the RoomRowSelectHandler:
walls = await WallService.WallsGetByRoom(SelectedRoomID);
Edit
To edit a wall record we must ensure that the user has selected a Wall row from the grid. To do this we use the 'WallRowSelectHandler' to derive the WallID (and WallName and WallSqM) and then check WallID is not 0 when calling Edit from the Wall Toolbar.
Add the following to the WallRowSelectHandler to get the variables we'll need:
SelectedWallID = args.Data.WallID;
SelectedWallName = args.Data.WallName;
SelectedWallSqM = args.Data.WallSqM;
Declare the above variables at the top of the code section, and add the following to the WallGridToolbarHandler in the 'Edit' section:
dialogTitle = "Edit a Wall";

//Check that a wall has been selected
if (SelectedWallID == 0)
{
    await DialogService.AlertAsync("Please select a wall.", "No Wall Selected");
    return;
}
else
{
    //populate wallAddEdit (temporary data set used for the editing process)
    wallAddEdit.WallID = SelectedWallID;
    wallAddEdit.RoomID = SelectedRoomID;
    wallAddEdit.WallName = SelectedWallName;
    wallAddEdit.WallSqM = SelectedWallSqM;
    await DialogWall.ShowAsync(false);
    StateHasChanged();
}
The WallSave method has already been created, but we need to modify it to handle edits. Add the code below into the 'Edit' section:
//It's an edit
// Check for duplicates
int duplicates = await WallService.CountWallsByNameAndRoomAndId(wallAddEdit.WallName, wallAddEdit.WallID, SelectedRoomID);

if (duplicates == 0)
{
    try
    {
        await WallService.WallUpdate(wallAddEdit);
        //Refresh datagrid
        walls = await WallService.WallsReadByRoom(SelectedRoomID);
        StateHasChanged();
        await DialogWall.HideAsync();
    }
    catch
    {
        // Display warning message
        await DialogService.AlertAsync("An unexpected error has occured.", "Unknown Error");
        return;
    }
}
else
{
    //Wall already exists - warn the user
    await DialogService.AlertAsync("This wall already exists for this room", "Wall Already Exists");
    return;
}
First, we check for duplicates, using the count that includes the wall name and room Id, but excludes the current record being edited. If there are no duplicates, we call the WallUpdate service and refresh the wall grid in a try/catch section. If the update fails for any reason the user is notified via the Syncfusion DialogService.
Delete
We are now only left with the Delete toolbar option. For this we can copy/paste/amend the code used for deleting a room. Insert the following:
//Code for deleting
if (SelectedWallID == 0)
{
    await DialogService.AlertAsync("Please select a wall.", "No Wall Selected");
    return;
}
else
{
    bool isConfirm = await DialogService.ConfirmAsync(
        "Are you sure you want to delete " + SelectedWallName + "?",
        "Delete " + SelectedWallName);
    if (isConfirm == true)
    {
        await WallService.WallDelete(SelectedWallID);
        //Refresh datagrid
        walls = await WallService.WallsReadByRoom(SelectedRoomID);
        StateHasChanged();
        SelectedWallID = 0;
    }
}
Save all files and run the application.
Cascading Grids - there's more
At present the cascading grids don't behave exactly as we would like:
- Deleting a room leaves the walls for the deleted room visible (even though they have also been deleted!)
- Adding a room leaves the walls grid populated with the walls for the last selected room (if a room had previously been selected).
- Selecting a different project leaves the wall grid populated, and doesn't re-initialise the SelectedroomID
To correct these anomalies we need to set the walls object to an empty object for each of the above. We do this by inserting this code:
walls = Enumerable.Empty<Wall>();
SelectedRoomID = 0;
Insert the code into
- Delete option for RoomToolbarClickHandler
- Room Save method for adding a record
- OnChangeProject method


Save the files, run the application and test.
Formatting numbers
But we aren't done yet! One last thing (actually, two!) I want to tackle is the format of the SqM column in the Walls grid, and adding a total for SqM.
The simple one first. To format the SqM column in the Walls grid, add 'Format = "n3"' to the GridColumn tag for the SqM column; this will format the number to 3 decimal places and if appropriate insert comma separators for thousands.
Adding a total for SqM is more demanding. After the GridColumns closing tag, add the following:
<GridAggregates>
	<GridAggregate>
		<GridAggregateColumns>
			<GridAggregateColumn Field=@nameof(Wall.WallSqM) Type="AggregateType.Sum" Format="n3">
				<FooterTemplate>
					@{
						var aggregate = (context as AggregateTemplateContext);
						<div>
							<p>Total Net Area (SqM):   @aggregate.Sum</p>
						</div>
					}
				</FooterTemplate>
			</GridAggregateColumn>
		</GridAggregateColumns>
	</GridAggregate>
</GridAggregates>
Save the files and run the application to test one last time.
Resources
- Code for this post
- Syncfusion Aggregates Documentation